Monday, December 28, 2009

Xmas Wrapping


This year's wrapping was inspired by a blog I saw that I can't remember right now. I'll put up a link when I find it again. I made bags from interfacing using red zigzag stick on the sewing machine, then tied them with butchers/bakers twine. I got some really thick stuff off the internet which is great! I bought some really thick red felt from Paperchase and cut out letter name tags then tied German cake decorations to the knots.

Saturday, December 05, 2009

Christmas Cards


Today I was in Paperchase and was suddenly seized with the idea to do some glittery Christmas cards. A pack of red glitter, a glue pen and some red card and I was ready for action. They are now drying and spreading glitter over every nook and cranny of the house.

Do not think that there was no suffering involved though. Today turned out to be London's busiest Christmas shopping day so in honour of this they'd closed Oxford street and changed every bus route. yeah, that's really helpful.

To help us shoppers along they had the constant noise of a helicopter circling above us, big PA systems and weird promotional stands in the streets desperately trying to get people to spend money. It was like being in a warzone, except for the bombs and the general death and horror thing.

Anyway, tomorrow it's back to quilting...

Thursday, October 29, 2009

Current Quilting Project


So I've been cutting templates, cutting material and sewing curves. All for my little latest project. It's a small one so it's a nice change after all the more longterm projects I have been working on. It uses small panels of really bright colours amidst large expanses of white. I think it will look really good. More as it comes.

It's the Autumn Quilt Festival at Chilford Hall on November 6-8th. I am so excited. I am going to restrain myself though as I went rather mad at Birmingham. All I need is some white material to finish this project off and a backing material perhaps. But what can I say? sometimes you just can't help yourself! Clairey will restrain me right? right?

Thursday, October 15, 2009

Applique bits


I sewed my last leaf today and ironed all my bits. I've been taking it very slowly, as it's a bit laborious to try and do it solidly, but every time I sit down to watch TV I've been doing what my mum advised. Tacking leaves and sewing circles. After my awful attempt at the fast way, the difference it makes doing it this slow way is amazing. I am half tempted to unpick my first attempts but if I did that I think the quilt would no longer me my test quilt. There's something satisfying about being able to see your skills progress from one shitty edge to the final perfect one. Well I say perfect…

So in a nutshell, the winning applique technique I have found works best:

LEAVES
Iron freezer paper templates onto wrong side of material.
Cut round material leaving 1/2 inch seam.
Fold edges over freezer paper and tack right into paper roughly making sure you start outside in so your knot is easy to cut off once you've sewn it.
Pin and sew onto material 3/4 way round
Undo tacking, retrieve freezer paper and sew to finish.

CIRCLES
Cut shape out leaving 1/2 inch seam
Use a double thread making sure the lopped thread is at the end of the thread
Sew from outside in leaving a small loop on the outside to start with
Small tacking stitches all round circle
To finish come out through the top into the loop
Place mylar template inside and pull thread in loop to tighten
Iron
Extract mylar

It's a real rigmarole. Definitely more pernickerty than other methods I've seen, but it gives a foolproof finish as the shapes don't look lumpy when sewn on. Maybe as I get better I'll do it differently, but my mum still uses this technique and she is an applique machine I tell you!

Sunday, August 30, 2009

Applique Decisions


I rented out "The Art of Applique" from my mum's library and it's perfect. Everything you needed to know about Applique in a thin, straight forward book with lots of diagrams. Every variation of method explained from start to finish. Everything is clearer now. You can click on the above images to see them larger but they just explain what I have been doing so far this weekend.

I started by cutting some test strips, each using a different method. One strip was ironed into three (which was easier than I thought it was going to be) and hand sewn in place. The other was ironed in half and machine sowed on one side, tacked, then hand finished on the other. Each created a different effect. In the end I decided to follow the same technique used in the quilt instructions which I understood a lot more after reading this book.


The folding in half method creates a raised stem which I like and is slightly quicker. You can't really see what I mean from the image though. Anyhow, I had already photocopied my design onto tracing paper so I needle punched holes down the stems. This is my version of prick and pounce which is just a way of transferring a design onto your material. Previously I've just used a lightbox and lain my material over the design and drawn it on, but I decided to try out this method for a change. I had bought some chalk refills ages ago when I was with Claire so I thought I should try it. I put a small amount of the chalk into a film box, then dabbed a rolled up bit of wadding into it and dabbed the holes. I'd like to say I thought this all up myself, but it's all care of my mum who is the master in these matters. Anyway it worked like a dream and I just joined up the dots and got sewing.

Now I am thinking, Teen Wolf on the telly and I can sew those stems in place. I need to get a wriggle on as I have a backlog of other projects but this is the only one I can now do in front of the TV. This is going to take an age, and then I have to hand quilt round it ALL. There is no machine quilting on this quilt. It is a monster.

Wednesday, August 26, 2009

What I Bought

What did I buy from The Festival Of Quilts this year you ask?

I did spend a lot this year, but I sort of realised I would!
I'd like to say in my defence though that nothing was a frivolous purchase, well apart from one... the biggest one. But the rest, the rest were all for some specific project.

There was so much to look at, so much to choose from. The things that were hard to look at were:

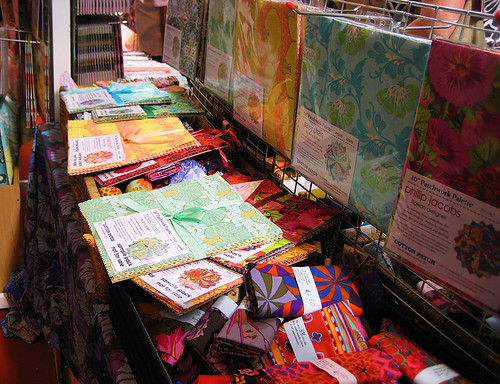
books - there just wasn't the time and they got pretty packed with people. Next time I'd go there first if that's what I really needed. Luckily my mum has every book I could ever need! She is like a quilt library.

Bolts - If you want large quantities of material it can mean queuing. I think people cater more for fat quarters and bundles really as they're easy to pick up and purchase.

Stencils - I just didn't see that many to be honest. I admit, instead of going round the whole thing I sat down with my mum at the start and marked the places I was most interested in on the floorplan then just went straight to them. I do need some stencils though for the next big project once I have cleared the decks a little.

Here's what I bought...
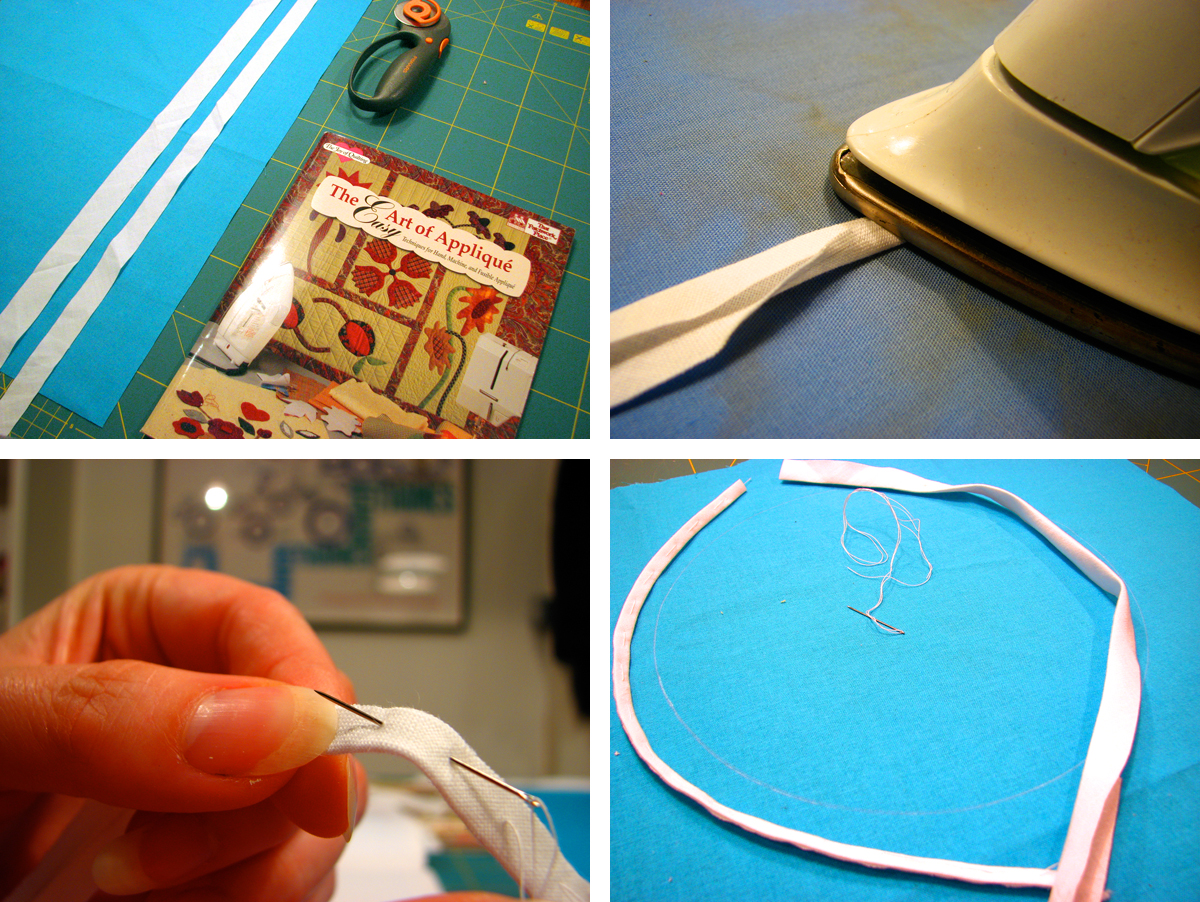
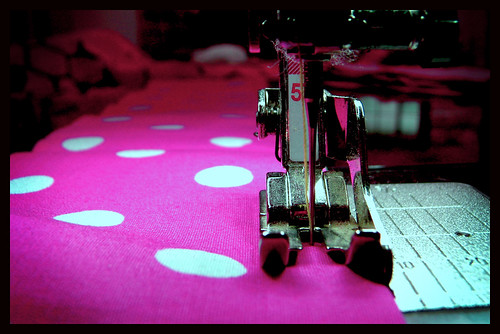


I love Madeira's Polyneon fluorescent thread. I just think it's very contemporary. I bought my first lot in 2006 and now some of them are nearly dead so I thought I'd invest in some big reels. I'd like every shade in the range really.

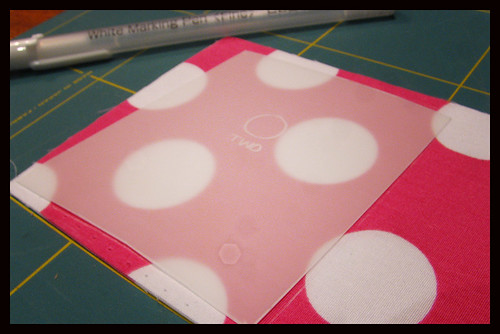
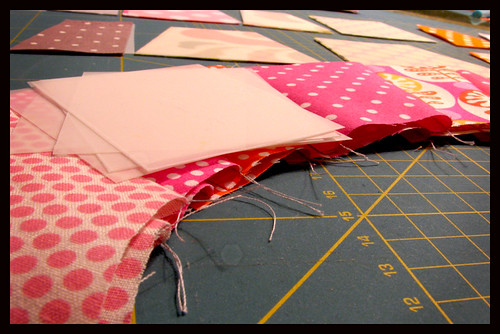
And as for the spots... well my love affair with them continues. These are all for a new project I am going to start working on, but more about that in the future.


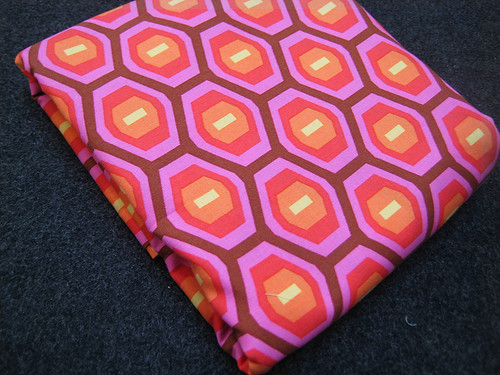
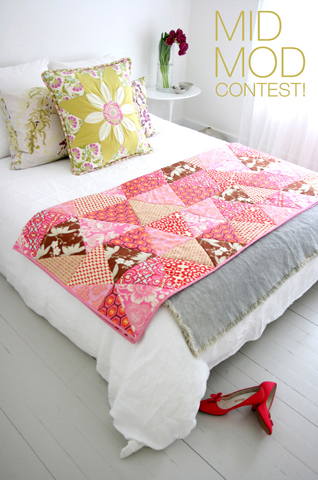
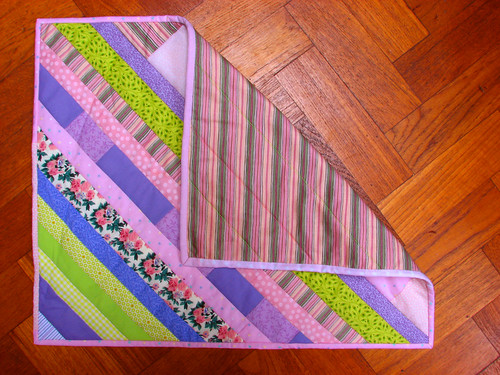
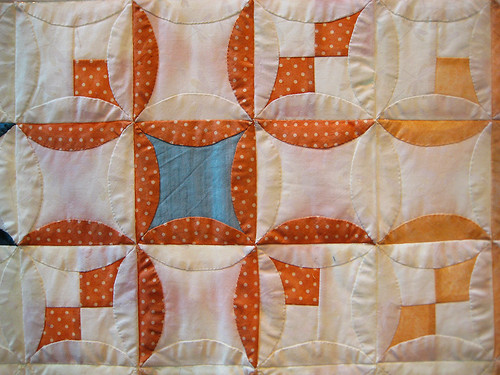
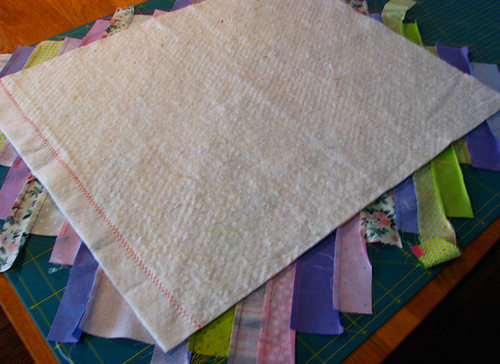
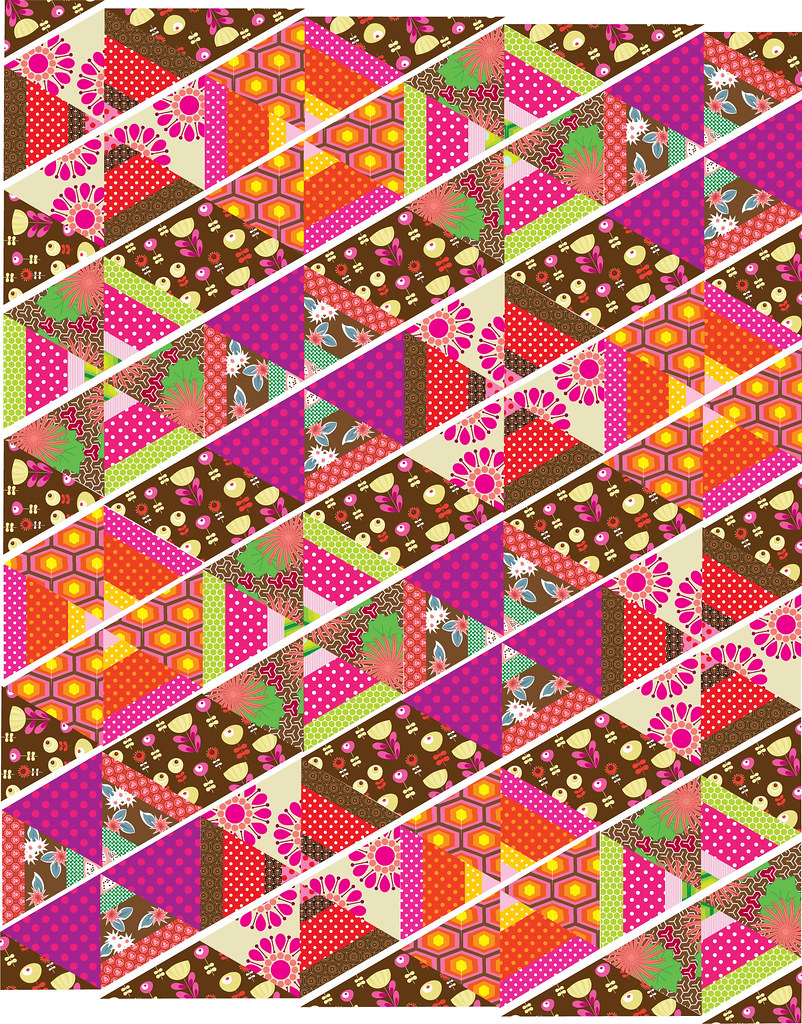
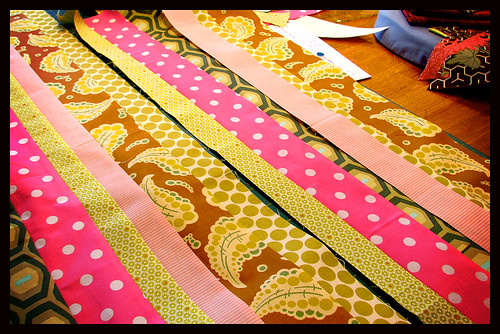
This is going to be the backing for the crazy 60° quilt which I have put away for a while. Might be time to get on with it now I have the last thing I need for it. This material was on sale as I think it's the end of the range. I love it so much. It reminds me of 70's Hanna-Barbera cartoons for some reason. I admit, I have been a bit done in by my electric quilt, BUT then I saw this picture advertising Amy Butler's Softwares CD and realised it is just like my quilt, even using the same colours! Well hers sticks to the red pink theme, but it has my backing in it and it looks lovely surrounded by a white room. I might have to make that one as well! Her blocks don't line up though which I find slightly unsettling yet intriguing. One for the Christmas list!


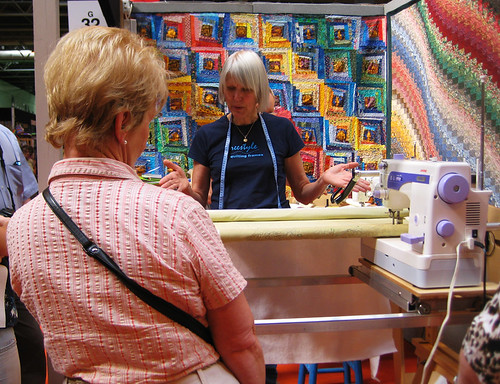
Speaking of my love for Amy Butler, it was her stall I went to first. Every year she plans to come to the show with the CottonPatch so this could be a yearly homage. My mum wanted to buy me a birthday present. Last year it took me 10 minutes at Amy's stall to find a book. This year it took 5. She says she has another book for next year so I probably won't even open it, I'll just buy it. My mum's never had it so easy.


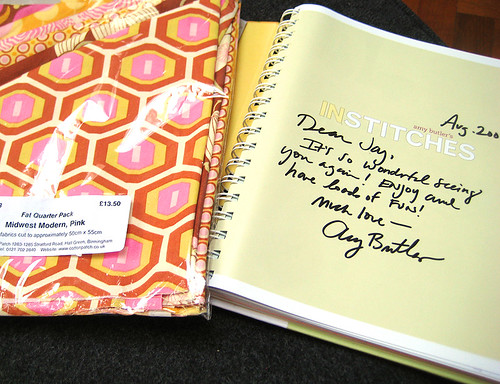
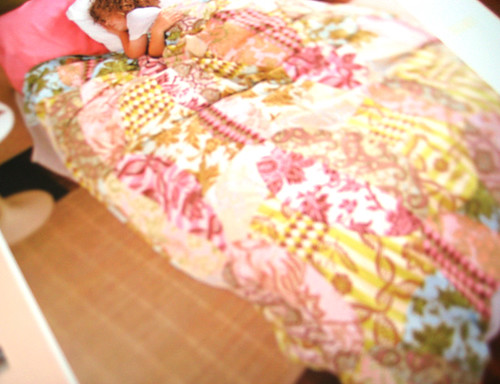
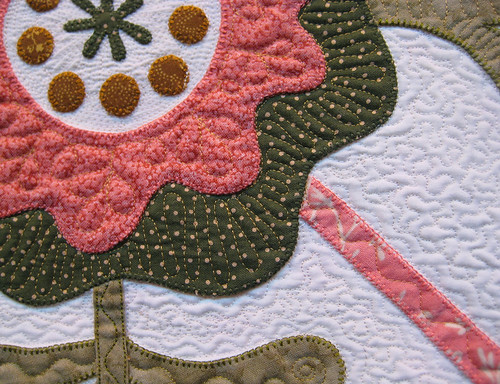
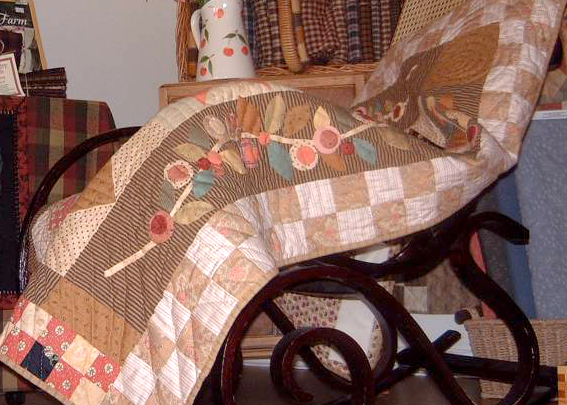
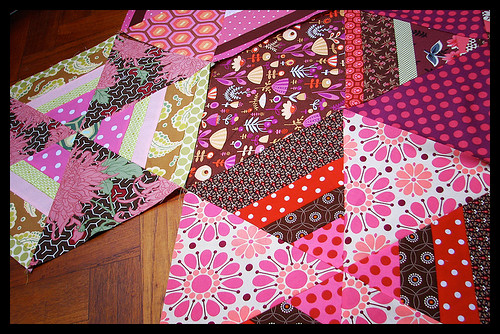
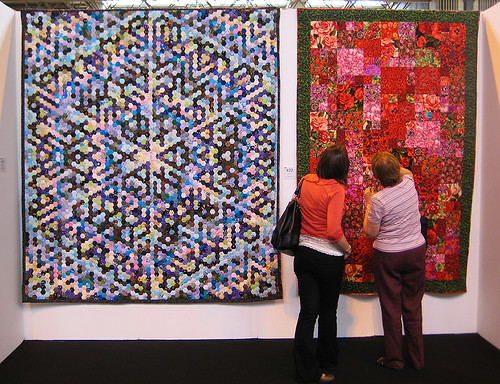
Because I am awed by fame and creative people, I had to have my book signed. Soon I'll be drawing love hearts round our names and writing soppy songs. The book is great though and so is the new colour range of material. I just need to get down and make something from it. It's not just quilts, it's everything! Saying that, these two quilts did catch my eye. You'll note how fuzzy my photos are. That's just me being too lazy to scan the pic in, but you get the gist.


That was it! Well nearly... I did really well until Rachel left me to go sit down. Within 5 minutes I had found another of my favourite stalls: 
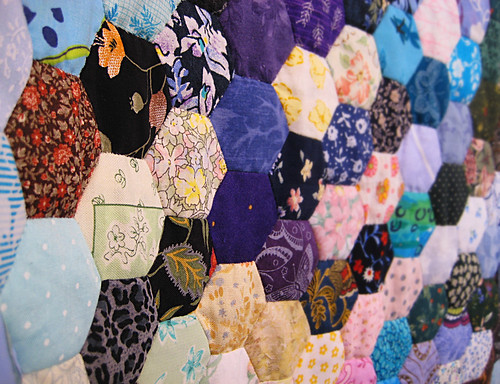
Petra Prins. They always have fabric I have never seen anywhere else and it always gets me right in the squishy centre of my Little House on the Prairie heart. I'm not the only one either!


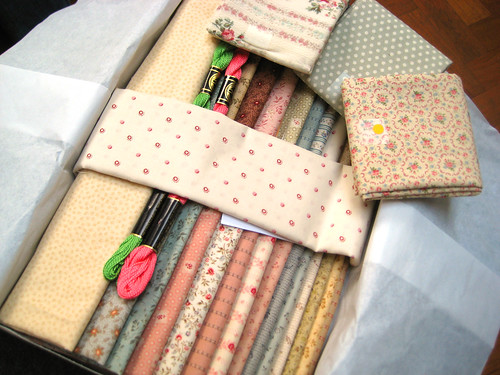
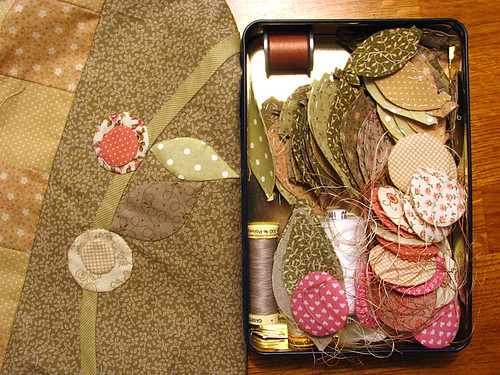
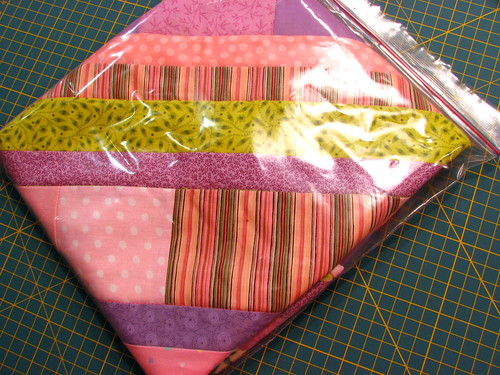
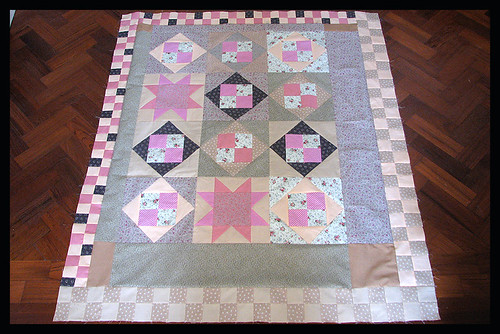
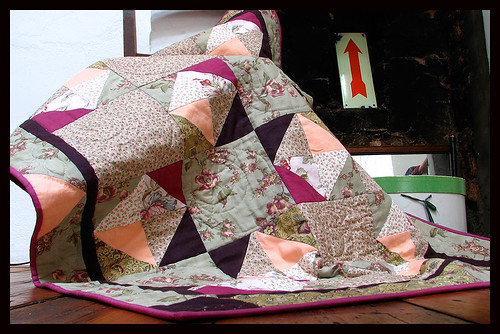
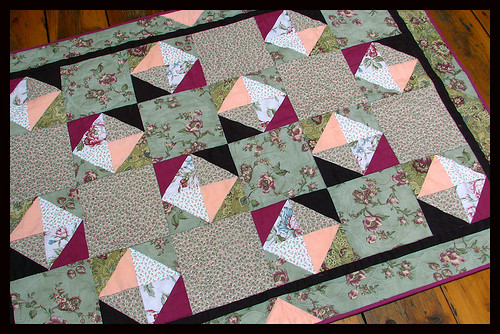
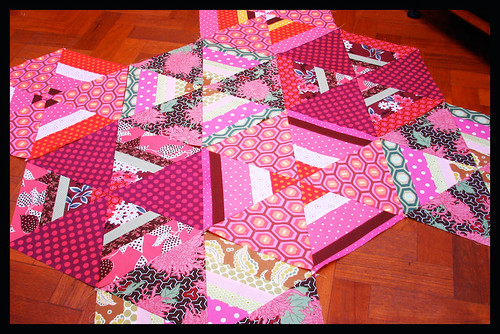
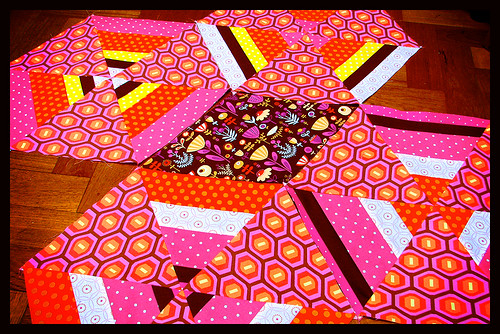
This is a kit. I don't usually buy kits. They're expensive. But I saw the quilt and then she just showed me the kit. I know I am a sucker. She even said I didn't need the kit, I could just photograph the quilt and make it myself, but that kind of reverse psychology merely fired my heart into action and I'd bought the box set before she had finished speaking. It comes in a lovely box, wrapped in ribbon and tissue paper. I suppose one of the joys of quilting is that even if you follow a pattern, the material you use can make the whole thing come out differently. Sometimes I don't want different. I want exactly what I see. I knew mine would never have the same colours as I am just not programmed to pick those colours out. So the kit is mine. I feel very indulgent.

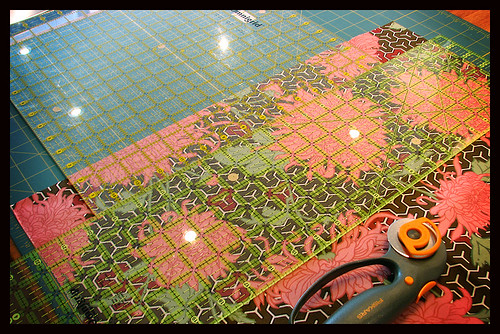
I bought a few extra fat quarters as I always think it's good to have a little extra and I never see fabrics that would match theirs anywhere so I am now prepared. I think I will shelve this one for a rainy day though. I know it's there like a treat, all ready to get on with. But my list of things to do is so HUGE already. I might have to do another round up of all the unfinished projects I have!

Anyway that's it.
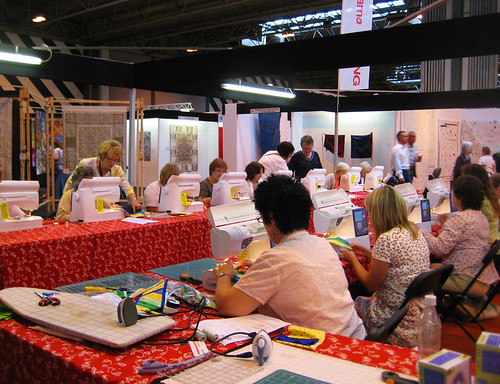
Birmingham Festival of Quilts OVER.
Until next year.

Now I am busy washing all the material in a pillow case, ironing it and trying to shove it into my stash cupboard. Time to start using the loft space soon. My stash is back to bursting level.

Incubator Quilt Finished


So last week I started the ickle quilt, tonight I added the binding and finished it off. I thought I'd use it as a test for doing a continuous binding and I'm glad I did as I made a right mess of it. I made the border too thin to accommodate the lumpy end bit. I tried to pin and sew the seam under but it didn't really work as it was just too thick.


You can finish it off in a nicer way which I think I will definitely do from now on as I realise the lump is just going to annoy me. Luckily it's packed up ready to go to the premature baby ward, to be given to some lucky baby along with the umpteen others my mum has been churning out. I've done my bit though so I feel very virtuous.


Monday, August 24, 2009

Things I Saw at the Show

The one thing you take away from a show, is how much you have to learn. There is something too intense about many of the quilts on show. They might not all be to your taste, but the sheer level of skill shown in them makes you realise what small fry you really are. Here are a few things that caught my eye


This was a miniature quilt that was so intricate. It was smaller than an A4 piece of paper yet so detailed.


This quilt was kingsize and was all hand sewn. It was amazing. I have a bag of scraps which will one day make part of an english quilt like this one. I think you need plenty of time for this sort of project.


This is a Petra Prins quilt that I bought the pattern for. I think it appeals to every Waltons/Little House on the Prairie instinct I have. I think the hand quilting is beautiful and I am quite excited about making the puffs! It might have to sit in the back burner for a while.


This quilt was massive and so intricate.


I think this is representative of a lot of the quilts that seem just too much. Too perfect. Too much detail. So perfect. Almost as if they aren't handmade. I can't imagine how much skill and time it takes to be this good! But I like to think of myself as more rustic, yes definitely. I like to embrace my inner makeshift-cobble-it-together nature.

The Festival of Quilts!


Just got back from The Festival of Quilts on at the Birmingham NEC. Crikey it's huge! This was my second year so I thought I would know what to expect, but I was still bowled over by the sheer size of it and the sheer number of coaches, spewing out hundred of people. There was so much going on. Workshops in the middle like this one...


Demonstrations like this one...


Exhibitions of competition winners...


And of course, stall after stall of things to buy. It was all so daunting, but so brilliant. Another year successfully over. I am a full convert now. Every year I shall be there! The train is great, The Birmingham International station is inside the NEC And there's a travellator that conveys you all the way there!

As soon as I have some time I'll show you the things I saw that I liked and fess up what I bought.

Tuesday, August 18, 2009

Incubator Quilt

My mum's guild make incubator quilts for the local hospital. It always seems like a lot of fun and since I have steadily been collecting offcuts, I thought I would give it a go, making sure it was all stuff from my stash. So here's what I did.


I cut an offcut of wadding 18.5" x 22.5". I had to sew multiple bits together with a zig zag stitch.


You sift through your stash for some colours that go together, then you cut your material into strips. They can be any width, but if they're too big they might look odd. I was told to make them between 1" & 3". I ended up making mine mostly 1.5", with a few 2" strips and one set of 3.5" squares just to jazz it up a bit. You lay the strips over the wadding so they overlap the edges and you sew each one to the next. I lined them back up on the wadding each time so I could check where they needed to be sewn. I had a lot of very small offcuts so I had to sew lots of strips in the middle to make them long enough.


You iron your finished shape then lay your wadding on top and cut round it.


It's really quick! I got this far in a few hours. Now here comes the tricky bit. I need to find a bit of backing big enough. It might have to be pieced together out of more offcuts. I'll have to do a search tomorrow. Things could get messy.

Monday, August 10, 2009

Applique


I've cut out all my shapes and drawn up my pattern. I might try using prick and pounce to transfer the pattern, or I might try photocopying it onto tracing paper and just overlaying it. I need to look up a few techniques.

Sunday, August 02, 2009

Applique


I've been putting it off for a long time, but finally I am finishing off this Maggie Wise quilt which I thought would be a good way to learn a bit of applique. The applique bits go on the two fat borders by the checks. It's all stems, leaves and flowers. I might draw out a diagram later.


Here's Maggie's quilt she made which I love. You can see the flowery vine on the side. This is what I am doing now, or rather, trying to do.


Applique is when you sew shapes on top of your material. It's fiddly and I know I am going to be awful at it. I actually did some on my second ever quilt, where I wrote the name 'ROWAN' on alternate squares of a quilt. (I really should photograph it for posterity but Rowan has it now and goodness knows where it is). Anyhow, I've forgotten everything I learnt as that must have been 7 years a go now. So it's a big learning curve.

I already got it wrong as soon as I started! First I cut templates out of this plastic stuff called mylar. You can just use cardboard but myla is transparent so I could trace them from the pattern. Then I folded some freezer paper, drew round the shapes, then cut them out with my nail scissors. What is freezer paper you ask? It's what americans use to wrap food in bizarrely enough, but it's got a shiny side which when ironed, sticks to fabric rather nicely. Basically you iron your shape shiny side down to the wrong side of your material, then cut 1/4 inch round the shape. I did it wrong by cutting out the fabric first then ironing the freezer paper on. I think it's better if you iron, then cut as your 1/4 border is more even.

Some people think that's too generous and that you should only leave 1/8inch, but I thought I'd maybe try both as I go along. There seems to be so many different ways in which people applique. I guess it's all about finding a way that works best for you. I quite like the needle turn approach where you remove the paper before you sew and you don't tack the seams beforehand, you just lay it down and tuck in under as you sew, as shown here and here. I've got a lot of tiny circles to do which I know are going to look pretty wonky at first so I might follow this method here but insert a lot of swearing. Anyhow, you can see from the numbers on each template that I've got a lot to cut out. It's all good for doing in front of the telly.

I might go home and raid my mum's books on the subject as she loves applique. I bet she has umpteen books on it. When I go to Birmingham I'll also be able to browse the book stalls, see if I can find me a good instruction book about it praps.

I can't wait until Birmingham! It's the mecca of quilting!

Monday, July 20, 2009

Broken DIshes


It's been rather hot here recently so not a lot has been going on. I have been doing little bits on this quilt which I have finally finished. I am quite into hand quilting at the moment so I spent a lot of evenings on this. It is the first quilt I have ever finished that is for myself. It's a really simple block called 'Broken Dishes' which is just half square triangles. I think the best thing is matching the right tones. I had a black and white print out diagram which took a little while to get my head around. Now it's back to the other half finished projects before I start two new projects I have had in my mind for some time. I think one of them might end up entirely hand quilted which will be a labour of love.

Sunday, June 14, 2009

Getting Ahead of Myself


So I finally turned the page in the book and realised I'd just got too cocky and ploughed onwards sewing my hexagons together. It was only when I was explaining English patchwork to Claire that I realised I couldn't possibly machine sew my hexagons together. D'oh. So I spent every evening this week unpicking them in front of the TV and vowing to plan ahead from now on.

You have to sew the half hexagons together in diagonal strips first which I think could go horribly wrong so I have been super-anal and drawn out the whole thing beforehand. The white gaps represent the divisions between the strips. Now I just need to sort my piles out and refer to my picture.

Tuesday, June 09, 2009

The Last Block


So the last block is complete. It didn't turn out as red as planned as at the last minute I ditched the giant red spot for the solid panel and put in the giant pink flowers. I just felt it was getting a bit too spotty and that the red really didn't match the other panels as well.


I think the overall pink bias to the quilt just can't be ignored. When I laid out all the blocks I just felt that the big flowers went with everything.

Of course I am sad about it's loss now so I might have to make a smaller version of the original red block and put some solid white blocks in it. I might buy a 60° ruler for that one just so I can marvel at how easy it is when you have a proper template. but anyhow, must focus on one quilt at a time. Sewing the blocks together will be a telling time as half of me thinks they wont all tessellate together.


Here they are all laid out. They won't end up in order like that but I thought I'd just see how it would look. Ohhh it's so exciting. Part of me still wishes I could have made it with the materials from the original design. They are just so lovely.

Friday, May 29, 2009

A Bit More


I did the purple block (eeek it's very bright!) and thought I'd lay them out without the brown inbetween bits just to see how it looked. I think it looks like the kind of quilt you'd find in a gypsy caravan.

The greeny pink block is still may favourite, probably because I have none of the material that made it left! The maths works out pretty well. You need two fat quarters for the solid triangle and 1/2 a fat qaurter for the strips depending on how big they are. I've depleated loads of my stash as this is a very big quilt. Part of me wants to rush out and replace the material I have used, but the other part of me knows it is good not to keep amassing loads and loads of material. Life is never easy.

Final red block at the weekend!

Tuesday, May 26, 2009

A Note on Measuring


I asked my mum what the most accurate way to measure material was. I had been using the markings on my cutting mat a great deal, especially to establish right angles, but also for when material was bigger than my ruler could measure. My ruler collection is growing. When I first started my mum gave me a ruler she had snapped in half and a cutting matt with cm measurements on it.

And it did me proud for a good long time.

Then she gave me a giant square ruler which she was chucking out as she never used it. I think it's great! I use it all the time, but I do agree with her that it's often a little short.

One day though, I decided to upgrade my kit. I didn't need to really, but I think if you invest a lot of time in a hobby then it can be a real treat to indulge yourself with tools to make life easier. So I bought myself a Olfa Cutting Mat 24" x 36" in the sale at a Quilt show. I think a show is a good place to buy one as everyone is trying to persuade you to buy one then and there from their stall. This can make the discounts far greater than those found online.

I also bought my first ruler. One big, long 24x6" one to replace the snapped one. Having this allowed me to measure in the way my mum recommended. If your ruler isn't wide enough, then use two at once! So to measure an 8 1/2" strip. I measure 2 1/2" with the 15" square, then add the 6" ruler next to it. You'd think this would make all my blocks line up, but of course, there is plenty of room inbetween for me to botch it up!


Progress continues. It's getting rather garish. I half wish it was just my new green blocks with plain triangles inbetween, but there's no changing it now. I have to get to the bitter end. I think it will look great in a plain white room on top of white bed linen. Now for the red block. No one could call me subtle...

Monday, May 25, 2009

Bank Holiday


This bank holiday I thought I'd save some money by staying indoors finishing things off. Now I am on the making strips part of the quilt which is a lot of fun. I am still amazed that I can look at a collection of fabrics thinking they go together, only to sew them together and realise they don't half as much as I thought they did. This quilt is all about bold bright clashing colours so it's even more difficult, but it's good fun just taking risks and living with the results. I tend to always put the colours I feel safe with together so I look at this as breaking out of the box a bit.


The whole 60° thing is a complete mystery to me so as a result I am relying quite heavily on the template rather than measuring with my ruler. I have been reliably informed by my mother that templates are OUT and rulers are IN, but I just don't have her expertise. There's something quite reassuring and foolproof with a template so I thought I'd just run with it and see what happens. The only good thing about 60° cutting is the stretch you get with the fabric which allows you do a lot of 'tugging' when you're sewing the blocks together to get them to line up. I'm sure it's all going to go drastically wrong at some point but until then I am happily cutting up strips and making blocks.


Here's how it is shaping up. I am not quite following the pattern instructions as I am using a lot of small scraps which have been in my stash for years. Two bits of material were childhood clothes! My mum once made a quilt out of her beautiful 60's dresses which she had lovingly saved. She probably could have sold them for a lot of money as they were beautiful, but she loved them so much, she wanted something forever to remind her of those great days. I thought that was a really nice idea so I have incorporated strips from clothes than just remind me of being young. I had saved them for such a long time, it seemed fitting to finally be able to use them for something. It means there are a lot of random seams in the middle of strips but I quite like the effect. It's a bit like Kim's washed and worn jelly rolls where you'll suddenly get a strip with a pocket on it!