Showing posts with label Tutorial. Show all posts

Sunday, April 07, 2013

iPad holder tutorial

20130406-P1250648.jpg 
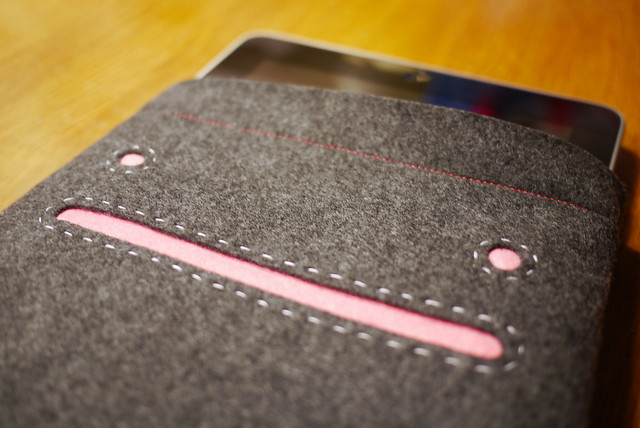
If you ever have need of an iPad holder to attach to a cot then below is how I made it. It only took a few hours and I'm really slow!

20130406-P1250585.jpg 
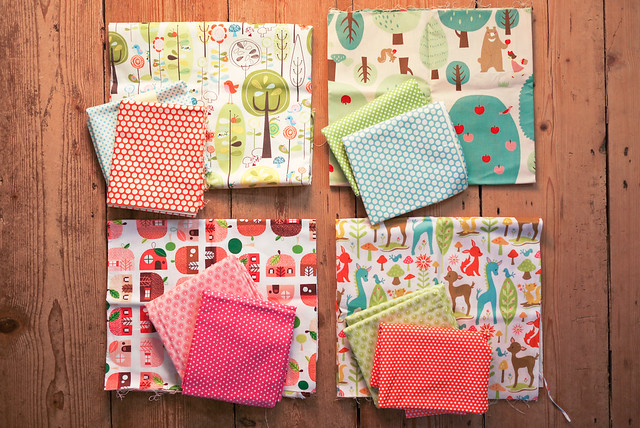
The best bit was going through my stash and choosing fabric. I couldn't decide what combination to use. I spent ages looking at combinations. It was really nice. I chose the top right combination in the end which is

1. Trefle by Kokka Forest Friends, Girl and Bear Picking Apples. This is my outside fabric
2. Kei Honeycomb Dots in - Blue. This is my intside fabric
3. Windham Fabrics McCalls Dots - Green. This is my binding.

20130406-P1250595.jpg You need:
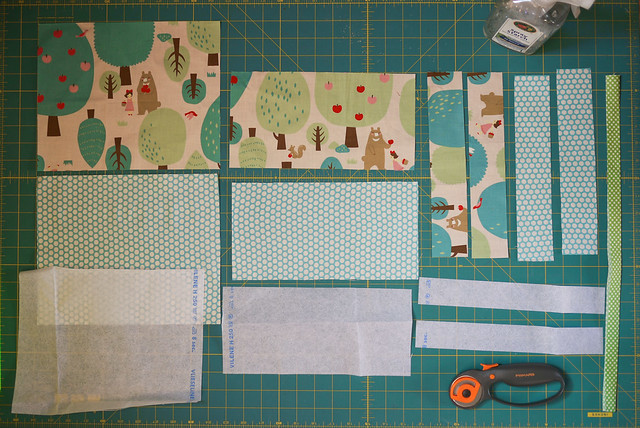
A. 2 x Main panel 10 1/2" x 8 1/2" from fabrics 1 & 2
B. 2 x Pocket panel 10 1/2" x 5 1/2" from fabrics 1 & 2 
C. 4 x 10 1/2" x 2" Straps from fabrics 1 & 2 Plus iron on interfacing for each shape cut 1/2" smaller
D. 1 x 10 1/2" x 1 1/2" from fabric 3

20130406-P1250597.jpg 
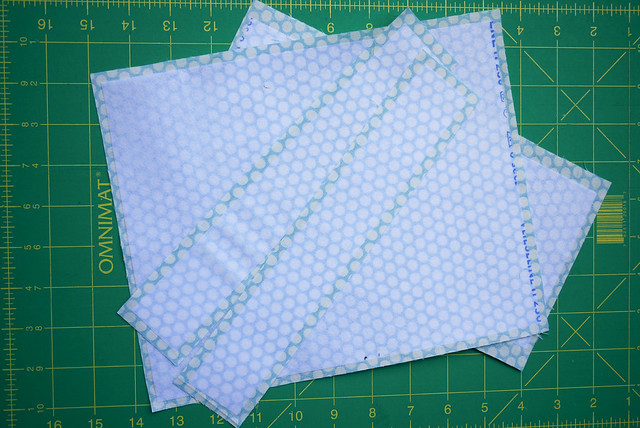
I ironed the interfacing onto the wrong side of all the big blue dotty inside fabric leaving approx 1/4 gap all the way round. It doesn't have to be that accurate. It just makes your seams a bit less bulky. You could do it same size if you wanted.
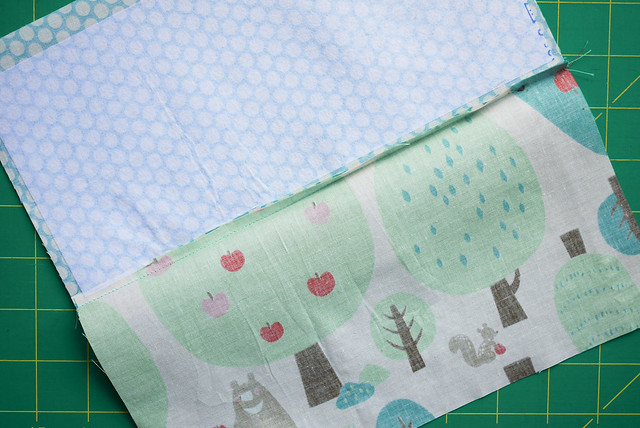
20130406-P1250599.jpg The pocket Take both parts of your C shape which form the pocket and sew right sides together along one long edge. This is going to be the top of your pocket so make sure your fabric is the way up you want it. Iron seams flat.

20130406-P1250601.jpg20130406-P1250604.jpg 
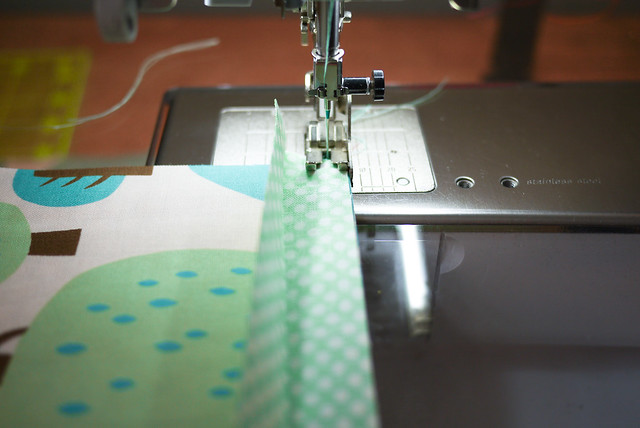
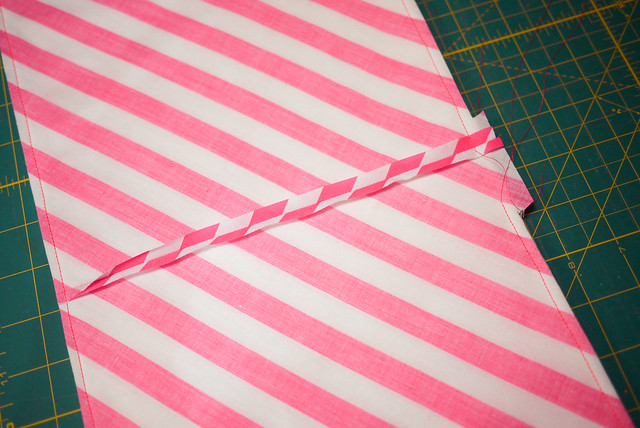
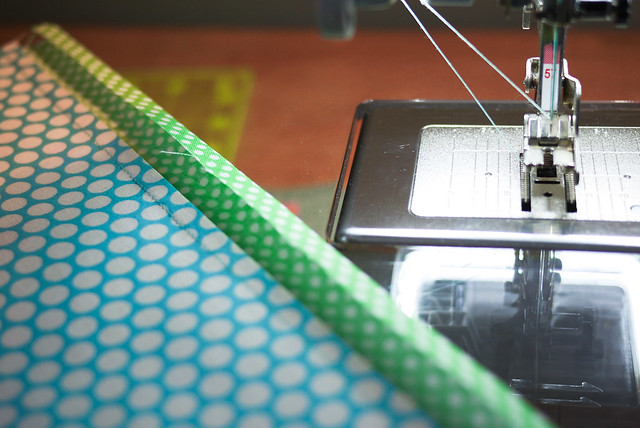
Press flat your binding in half lengthwise and sew one wrong side edge to the pocket seam. Then press the other edge 1/4" in and fold your fabric over the top of the pocket. You should see the middle of the fabric becomes the edge of the binding and the 1/4" folds in so you have a nice neat edge to the fabric.

20130406-P1250606.jpg20130406-P1250607.jpg 
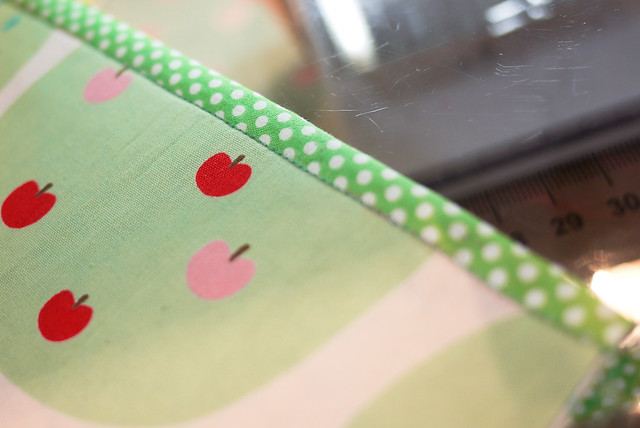
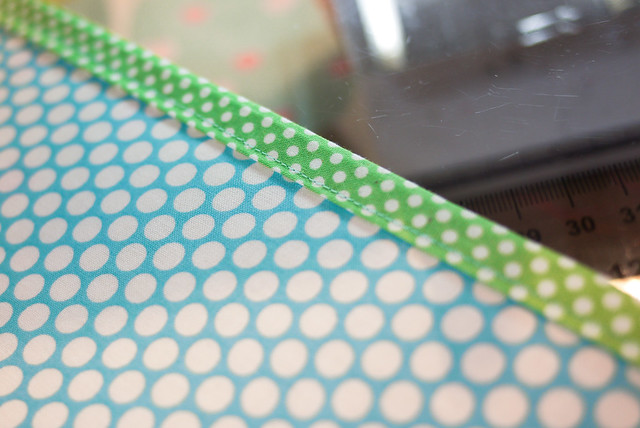
I then turn the whole thing over so the sewn edge is facing upright and sew along the edge of the binding making sure that the edge underneath is larger so the needle is bound to pierce it. it's easy to show in pictures.

20130406-P1250610.jpg 
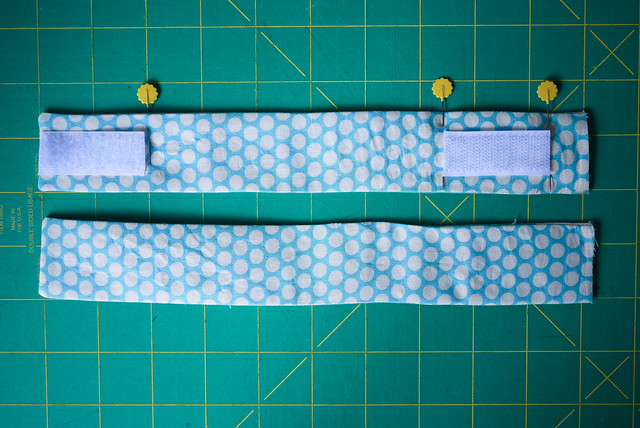
Then sew 2 straps from shape C leaving a short edge gap so I can turn them right side out. Once you have done that I attached velcro (I can't do button holes). I measured the bars of the cot to work out where to place the velcro but it's roughly at the top seam and 1" from the bottom. 1/4" at the bottom you will lose when you sew the straps into the main body.

20130406-P1250613.jpg 
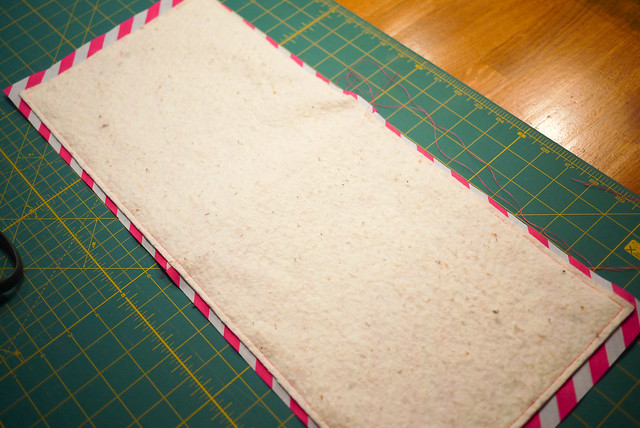
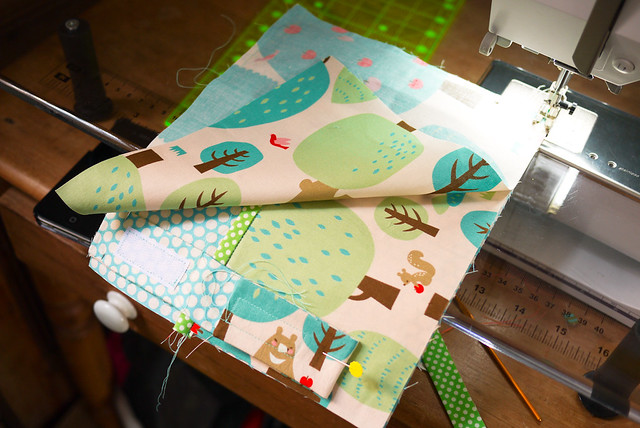
With all the elements done, you then construct your sandwich. 1st you place the backing A fabric right side up, then you place the pocket on top the way you want it to look at the end, so I want the bears facing front and the dots inside the pocket. Then you pin your straps so they meet the seam at the top part of the main (A) fabric panel. I put them 1/4" to 1/2" in from the edge so I don't sew over them when I sew all round. Then lastly I place my main fabric for panel A with the right side facing in. Then I start sewing 1/4 of the way towards the end of the longest edge of the panel without the straps. I do a few backwards and forwards stitches as I am going to pull this seam when I turn the whole thing inside out. I go round the entire shape taking my time with the bulky straps until I am 1/4 way in from the long edge I started on. This should give me 1/2 of the length in which to turn the whole thing inside out. Again I do backwards stitching at the end to make the seam strong.

20130406-P1250618.jpg 
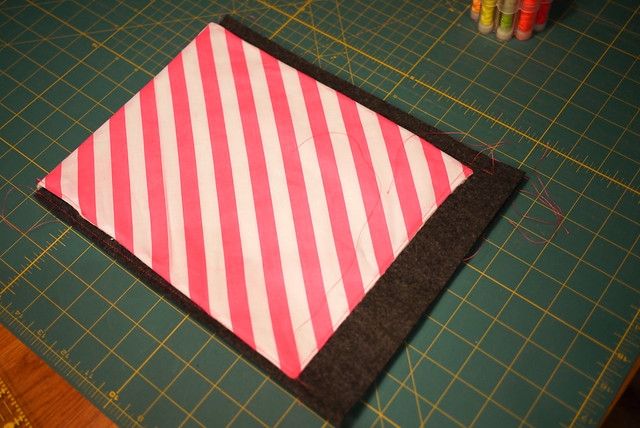
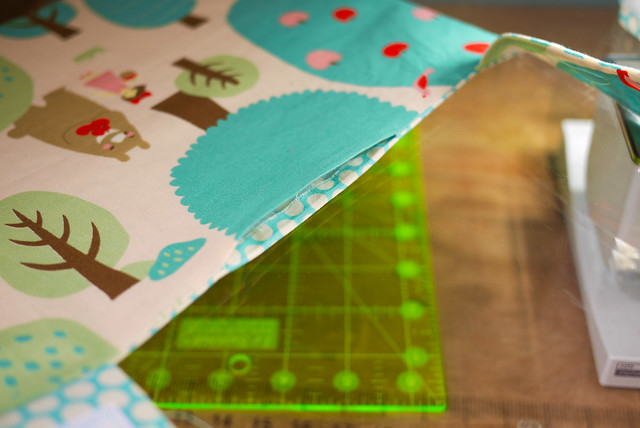
Here's the gap I have left. I turn everything the right way round and press it all flat. I take care to press the seam here so I can then run the sewing machine along the whole line near the edge.


20130406-P1250632.jpg20130406-P1250621.jpg 
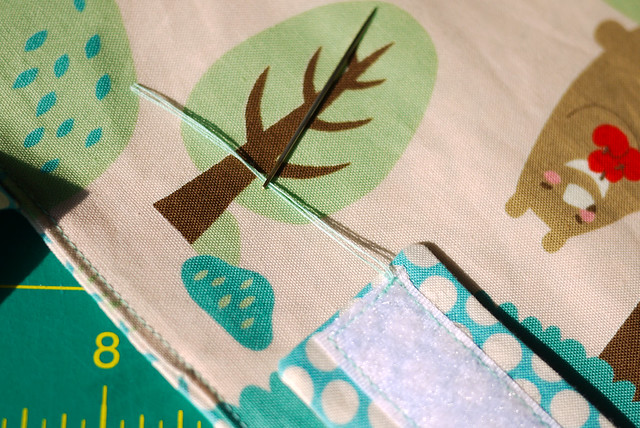
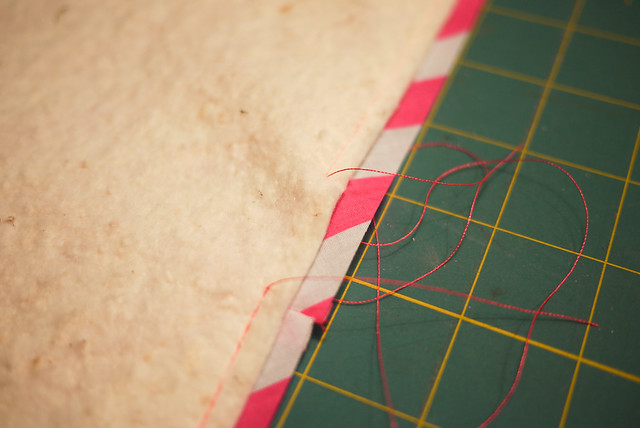
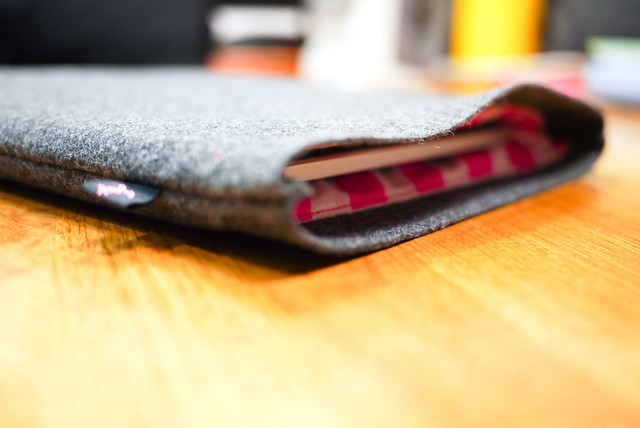
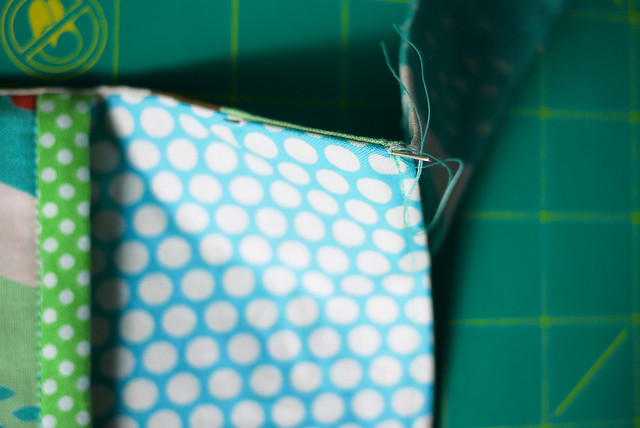
Then to finish off I bring all my threads to one side and knot them. Then with a big needle, I thread the ends back into the fabric and cut them off.
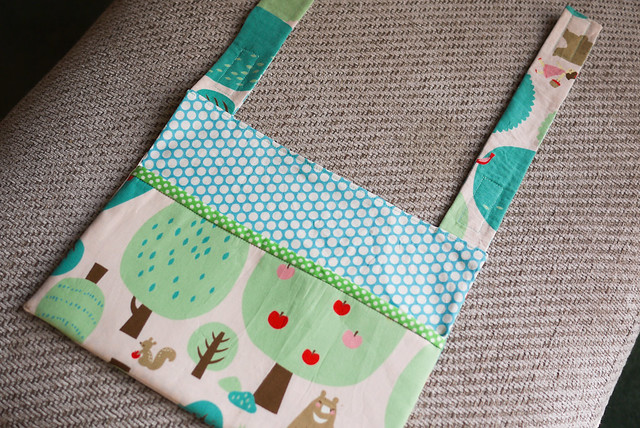

20130406-P1250641.jpg Done!

Tuesday, August 17, 2010

iPad Case Round Two!

iPad case 03

Wow! my iPad case made Whip up! My iPad case post was described as a 'neat tute'! Cooooooool. I am dead chuffed.

In celebration of this, I thought I should test out the instructions and see if I could follow them. I thought Sparky might like this case and he's not quite so strict about a bit of craft flare, hence I gave it a face!

iPad case 04

iPad case 02

Friday, August 06, 2010

iPad Case

20100805-P1060255

20100805-P1060263

20100805-P1060257

It had to happen. The new iPad has been wrapped it tea towels and jumpers all week. Finally it found a baggy home in the laptop case, but when I had to take the laptop out I was sans case and I knew I needed to do something makeshift whilst The Pony decided which case to buy for it. So I made a plan.

IPAD

You need:
Outside material - I used collar felt which tailors use. It's quite cheap but very thick. You can buy it in John Lewis.

Inside material - I starched some cheap stripey material I got for £4 in Borowicks on Berwick Street in SoHo. They have lots of cheap material.

Wadding - I used offcuts of stuff I had. It doesn't really matter what you use as long as you think it thick enough to do the job.

Thread - I used some neon thread to match my inside lining.

20100805-P1060241

Step 1 - I cut all the material to size using the above diagram. These are pretty rough measurements which allowed me to cut things down after I had sewed them which I find helps to make things look more perfect. You need 2x the inner fabric and the wadding which you need to sew together at the base unless your material is long enough for you to cut one long bit. My stripey material wasn't long enough so I sewed two bits together not worrying about matching up the pattern as this will be at the bottom of the case.

20100805-P1060247
Untrimmed

Step 2 - I sewed the inner material, fabric side down, to the wadding with a 1/4 inch seam leaving a 2-3 inch gap in the middle so I could turn the fabric inside out. (Because the materials are different sizes I always follow the smaller piece and have that on top when I am sewing). I then trimmed the inner fabric down to match the smaller wadding size leaving a bit to turn in on the gap I created which you can just sew together after turning. No one will really see it so I didn't do anything fancy, I just whizzed over it on the machine.

20100805-P1060246
Mistake No.1: My gap is two small. I had to unpick it. I only left an inch. Boo.

20100805-P1060249
Mistake NO.2: See I tried to be neat with my seams which is often important in intricate patchwork. I ironed them out, then forgot and sewed over wrongly on the left. Boo. It's not important but it's good practice. You can see this is the trimmed version with the bit left to turn over the gap.

Step 3 - So you have two long rectangles. I folded my felt in half, ironed it flat, then I folded my material and wadding in half and pinned the top of the material to the felt material side up. I should have perhaps spent more time being accurate as you want the tops to line up. Then I unfolded it and sewed a straight line across each small edge of the material (it being smaller, I followed that edge). Thus anchoring it to the felt.

Instead of tying off threads I used Angela's technique of starting off with a really small stitch length and doing a back stitch by putting the machine in reverse before making my stitch normal and carrying on. I only do it for about 5 stitches but it means you can just cut the thread without thinking about it unraveling.

Step 4 - After this I folded it back in half and sewed both the long sides. I didn't want my wadding to be in my seam as it would make it too bulky so I sewed the felt together around the edge of the wadding (except the top! You need to get in it) Does that make sense? It means the wadding comes away from the inside if you push it, but I didn't think it would matter if an iPad was all that was going in it.

20100805-P1060252

Step 5 - I then trimmed away the felt leaving 1/4 of felt at the edges and 1/2 inch at the top opening so the lining wasn't too visible.

And it looks like this! iPad case. Done. In about an hour.

20100805-P1060266

Update! I made another case here

Sunday, August 01, 2010

Crochet

Crochet 01
Finally after a few wrong starts I've come up with my version of the square. I couldn't work out the pattern on the blog as I am not that great at following instructions. So that I can remember it and just in case you want to follow it, here's the pattern I am using. I've never written down a pattern before. I am probably not being very clear so I have inserted lots of pictures.

CH = Chain stitch
SS = Slip stitch
TR = Treble crochet (UK) in the US it should be a Double crochet.

Crochet 10
Foundation ring: Yarn A, work 4ch and join with a SS to form the ring. (I always make my stitches very loose as it makes everything easier).

Crochet 09
Round 1: 3CH (counts as 1TR) then 1TR into ring, then 1CH, repeat 1TR + 1CH 10 times (12TR total), join with SS into 3rd stitch of 3CH. Break off yarn. This should give you a circle with gaps between each treble.

Crochet 11


Round 2: Join yarn B inbetween the first and last treble of previous round. (I always start with quite a loose slip knot so I can pull it tighter later when I tie the ends off and pull the knot to the back).
Crochet 08

3CH inbetween two trebles in the gap the CH from the previous round has created (counts as 1TR)
Crochet 07

Then 1TR into the same gap, then 1CH. Repeat doing 2TR + 1CH into every gap between the TR in the previous round created by the CH to create 12 groups of 2TR. Break off yarn.

Crochet 06"
You should see when you stretch it that you have gaps inbetween the TR groups.

Crochet 04


Round 3: Join yarn C in the gap between TRs created by the CH of the previous round. I usually join between the last and the first TR.

Crochet 03

3CH (counts as 1TR) then 2TR and 1CH, then 3TR + 1CH in the next CH gap pf the previous round. Repeat 10 times. (12TR total). Break off yarn.
Crochet 02


Round 4: Join yarn C in the gap between TRs. I usually join between the last and the first TR space. 3CH (counts as 1TR), 2TR, 3CH, 3TR to make your corner, then 3TR + 1CH into the next CH space of the previous round, repeat 3TR + 1CH into the next CH space of the previous round, then in the next CH space make a corner with 3TR, 3CH, 3TR. Repeat to end until you have completed all four corners and tie off.

That's it! Does that make sense? Now I just have to learn this joining at you go thing.

Thursday, January 29, 2009

Part Five : Designing a Quilt


How about a simple project to get you started? The first quilt I ever did was just made up of squares. It's simple, but it always looks good. First, work out what size you want it, then think about splitting those measurements into blocks. A block is just a unit of squares. You divide your quilt into 3x3 blocks (a nine block) You then make up each series of squares into your blocks, then you sow all the blocks together. It's just easier and more accurate than creating long strips and doing it row by row. Blocks come in all different units, but nine is very common. Blocks are often talked about in terms of finished size. This is not the size you cut them as you add on seam allowance which is always 1/4 inch.

For example, I decide to make a cot quilt that's 26" x 38" because I can easily split this up into a grid of 8 x 12 squares or 4 x 6 squares. Here are some simple ideas.


Quilt A
96 x 3" squares. 3 1/2" inc seam allowance.

Quilt B
12 x 6" squares. 6 1/2" inc seam allowance.
108 x 2" squares. 2 1/2" inc seam allowance.

Quilt C
12 x 6" squares. 6 1/2" inc seam allowance.
48 x 3" squares. 3 1/2" inc seam allowance.

Quilt D
12 x 6" squares. 6 1/2" inc seam allowance.
36 x 2x6 strips. 2 1/2" x 6 1/2" inc seam allowance.

Wednesday, January 28, 2009

Part Four : Patterns


So either you decide to measure and make up your own quilt, or you buy a pattern which will tell you how much material you need, what to cut, some even supply the material if you're willing to pay for the privilege. The patterns I like are mostly from Sunflower Fabrics. I have made the Country Quilt here and the Little Stars for Granny here and I am about to make the Rose Gold Quilt.

Books and magazines are the best sources of patterns as they are always very thorough and talk you through every step, but below is a list of pattens I found online which I like.

Free Patterns

Amy Butler's Mid Modern Quilt Look in the free patterns section
Olive Rose Quilt Pattern

Almost a Flower Garden
Merry Go Round
Some block patterns which you put together
Here's a long list of free patterns, most though, are not my kind of thing

Patterns
Sunflower Fabrics Patterns
Floral Dreams
Tikki Patterns

Patterns with material
At Waters Edge
Julia
Decorator Quilt

Magazines
Usually whatever quilt is on the cover has a pattern inside.
Australian Patchwork & Quilting
Fabrications
Contented Cat
The Quilter
McCalls

But what if you just want to design your own...

Tuesday, January 27, 2009

Part Three : Buying Material


So material comes in different shapes and sizes all sold in yard increments. The smallest amount is usually a 1/4 of a yard square which is called 'A Fat Quarter'. I often just buy random fat quarters as they are inexpensive, but if you are doing a large quilt, then a fat quarter only goes so far hence it's often good to have a pattern in mind with some fabric dimensions. There is a good book full of projects which all use fat quarters, called Fast Quilts from Fat Quarters.

There are other styles of selling material. There are bundles of fat quarters which are often hand picked to all go together. I think Apple Roses is very pretty, so is September Blossom and Flirt. You could make a nice simple cot quilt with those if you just got something matching for any border or backing.

Here are some places to buy Bundles
Pink Chalk
The Fat Quarter Shop
Quilters Cloth
Sunflower Fabrics
Stitchin Post
Cotton Patch

You can also buy pre-cut material which makes life a lot easier. These come in the form of Charm Packs and Jelly Rolls. A Jelly Roll is when strips of the same width are wound together and sold as a roll. There are some very simple ways to use them. You can just sow the strips together, cut them randomnly, then keep sowing them together until you have long strips of materials which you sow all together. This pattern is an example of this, but to be honest it's so simple, you don't really need a pattern. For complex ideas you can buy books such as Jelly Roll Quilts which have more innovative ideas. I might make the Friendship Braid or the Daisy Chain using the Grand Revival Strip Roll or the Mary Rose Strip Roll. Another roll which is expensive is Yuwa Retro Roll.

I did a day school in our local patchwork shop in Cambridge where you chose from a huge pile of Jelly Rolls and made a quilt top in a day. It was great fun and I learnt loads and left with this! Kim at Washed and Worn makes beautiful Jelly Rolls and even has a free pattern on her site. She's at Chilford every year if you want to see all her rolls.

Here are some places to buy Jelly Rolls
Washed and Worn
The Quilt Room
The Bramble Patch
The Cotton Patch
Quilter's Haven

Material also comes pre-cut into squares which means you can just start sowing the together! These are called Charm packs. Here is a free pattern for charm packs. I quite like the 5" Neutral Charm, the 5" Heather Bailey Charm or the 5" Ava Rose Charm Pack Pack. If you can't see a picture of the squares then usually you can find that range of material in the main material section so you can see what you're getting. So the Heather Bailey is also a Jelly Roll so you can see what the fabric is like and so is the Ava Rose.

Here are some places to buy Charm Packs
The Quilt Room
The Bramble Patch
Imagine Fabric
The Cotton Patch
Puddleducks

In general though, you can just buy material on its own in increments of 1/4 yards. Fabric often comes in ranges created by designers. But it's a bit like fashion. Ava Rose by Tanya Whelan is everywhere at the moment but it might not be in a few months so it's best to have more than less. So perhaps deciding on your pattern before you buy makes more sense...

Monday, January 26, 2009

Part Two : Where to get Supplies


Getting the idea. Well ideas comes from all sorts of places, but in general I work on a 'I see it, I want it' basis. I find shops and shows and magazines a good way to see quilts I want. Usually the once a year show in my home town is more than enough to fill me to the brim with projects. Nearly every quilt on show is promoting a pattern and a range of material so it can be relatively simple to get going. The two shows I am hoping to go to this year are:

Shows
Chilford Hall Quilt Show - Cambridge - 13th - 15th March 2009
The Festival of Quilts - Birmingham - 14th to 17th August 2009

Other places to find inspiration closer to your fingertips is via books, magazines and online resources so below is a list of good things to get you going.

Books
Quilter's Complete Guide
I made this Durham quilt from this book. There's no patchwork, it's just one piece of white sheeting that you quilt designs over. It's great for learning how to hand quilt, but it takes an age.
Fast Quilts from Fat Quarters Quick and easy. More on what a fat quarter is later.
Around the Block with Judy Hopkins This book is great because it shows you various blocks and all the different measurements you need to make them your size.
Vintage Fabric Style Very tasteful and retro
Last-minute Patchwork and Quilted Gifts Small projects
Quilts! Quilts!! Quilts!!!
The Encyclopedia of Quilting and Patchwork Techniques
Quilts Galore: Quiltmaking Styles and Techniques
Traditional Patchwork Quilt Patterns with Plastic Templates
Jelly Roll Quilts This is only useful if you buy Jelly Rolls. More about them later.

Quilt shops in and around London
Lady Sew and Sews, Marlow, Bucks
The Quilting Bee, Enfield, Middlesex
Just Between Friends, Buckhurst Hill, Essex
Creative Quilting, 32 Bridge Road, East Molesey, Surrey.
Tikki Patchwork, 293 Sandycombe Road, Kew Gardens. A dedicated patchwork shop
Liberties, Great Marlborough Street. A small range of patchwork material, some of which is very nice
John Lewis, Oxford Street/Sloane Square. A small stock of patchwork material, most of which is pretty grim to be honest
Fabrics Galore,
54 Lavender Hill, Battersea. This is the place for contemporary fabric. I get a lot of spotty and stripey material from here.Here is a huge list of other places

There are also many online stores selling material. I can be a bit hit and miss as it's always easier to see material in the flesh but it's a very quick way to get stuff. There are too many to list so below I have just listed my favourites. There is so much material out there, some of it is harder to find than others. I find modern fabrics harder to come by so I have listed a few more of these.

UK stores
Sunflower Fabrics
The Quilt Room
The Fabric Room
The Cotton Patch
Quilters Cloth
Sew and sos
The Tabby Cat

Worldwide Stores
Reprodepot. Lots of vintage fabric
Pink Chalk
Sew Mama Sew. A great range of contemporary fabric
Purlsoho. An excellent range of modern designers
eQuilter. A monstrous cavern of every kind of material under the sun
Phat Fabrics
Sew Loves Fabric

Mail Order
Strawberry Fayre. A great system for buying plain fabric. They send you a bundle of swatches. You choose the exact colour you want and send the swatch back to them.
Quilt Direct. Their catalogue is full of everything you might ever need.

Other supplies
Creative Grids Everything other than material. If you don't use templates, the other way to cut material to size is with a cutting matt and a rotary cutter. This a great place to get them from. They also sell a plethora of inch rulers like you see in my pictures. A good wide, long one over 18" tall, a matt over 18" tall and a cutter are the best investment you could make. They even do an A2(in inches) starter pack for £26.79

Wednesday, January 21, 2009

Part One: Getting Started


So you want to make a quilt. What for? A bed? A cot? Your bed? Your cot? If you have a purpose is mind then the first thing you need to work out is what size it should be. The easiest solution is to just measure where you want it. Measure your mattress then ask yourself:

Will the quilt just fit the top of the bed?
Will it hang over and by how much?
Will the quilt have to cover pillows at the top?

There are two confusing things to know here though.

1. The weird thing about quilting is that it's all measured in yards and inches. You might find this annoying, you might live your life in cm and insist on that, but once I changed over I never looked back. It's all sold in yards, it's all talked about in yards, nearly every pattern is in yards so it can often be easy just to cave in and embrace the inch.

2. The internet is full of sizes and they're usually all different, even the terminology differs. A kingsize bed in the UK is a Queen in the US. Wiki will give you basic mattress dimensions across the board which are pretty standard, apart from slight variations depending on your geographical location.

Mattress sizes (so just covering the top)
Single/Twin 36 x 75"
Double/Full 54 x 75"
King/Queen(USA) 54 x 75"
Super King/King(USA) 76 x 80"


Me? I have just measured my king size bed. It's 60" across the mattress, then there's a 12' drop on either side to cover the depth of the mattress. If I wanted a pretty quilt covering my mattress I would probably round it off to 80" wide. I might decide it's going to be square so that way length is of no importance. Right, that'd be me done.

I wouldn't really suggest your first quilt is a huge one as it just takes longer than a small cot quilt. That's why I make so many baby quilts. They are so quick and easy that you don't end up getting bored of them. Cot sizes are all different. I often just guess mine as unless you know the cot you're never going to get it right and they probably use sleep bags anyway so it's all redundant. If it looks bigger than the baby then you're onto a winner!

Here are some sites which give you a range of dimensions
equilter
thequiltcenter

Crib - 50" x 53"
Single - 75" x 98"
Double - 83" x 106"
Queen - 90" x 106"
King - 107" x 108"

How to Make a Quilt

Someone asked me the other day about quilting. They knew nothing much about it but they wanted to get started. I'm not an expert in the slightest, my mum is, but it got me thinking about the process so I thought I would do a stream of blogs about my latest quilt from start to finish so someone could see how I go about it. Obviously my mum would do it perfectly, in some whizz-bang way with no mistakes, but I am not she. I can only show you how I muddle through it all and pass on a few links to books and websites. So prepare thyselves for Step One: Getting Started... coming sooon

Thursday, November 08, 2007

Make a Baby Ball!


For your attention and delight. If you want to make your own baby ball, download the PDF and get going. It couldn't be easier. If it all goes horribly wrong then you can hunt me down like a dog and give me a chinese burn.

Monday, August 06, 2007

How To Make a Sock Monkey


In lightening speed with the help of The Pony, technology has once again been restored. The link at the side should work now. Or simply click here. Let me know if you have any problems monkey makers.

Sorry the link expired for a while! I have updated it. Check my label on the left called 'Sock monkey' to see what these instructions make. Then check out the 'sock monster' label when if you feel brave.