Showing posts with label Baby Quilt. Show all posts

Thursday, August 01, 2013

A Wallis Baby Quilt

20130527-P1260527.jpg

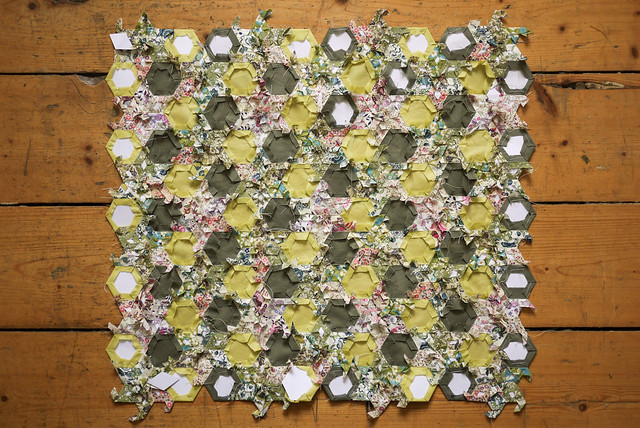
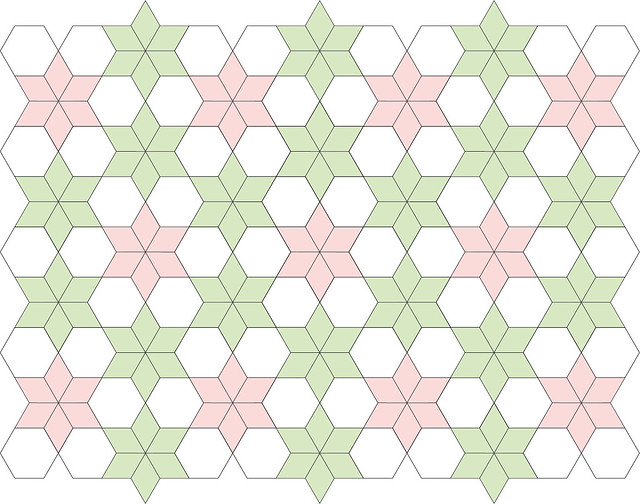
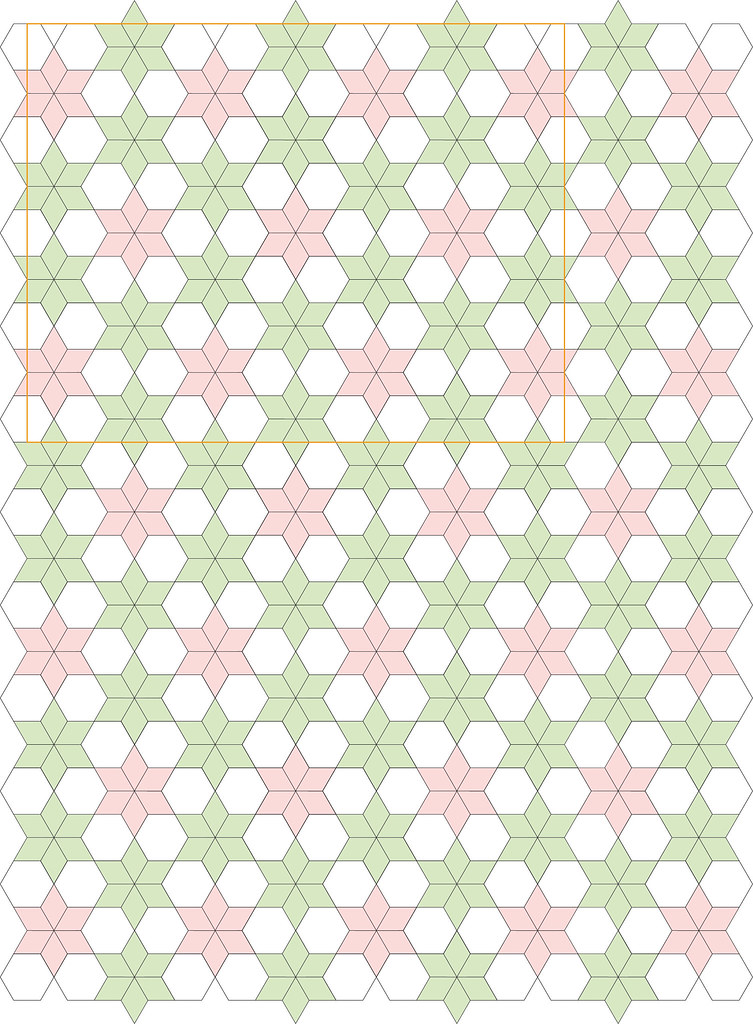
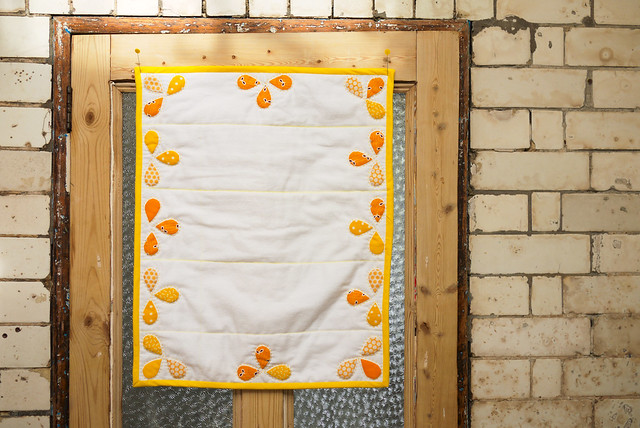
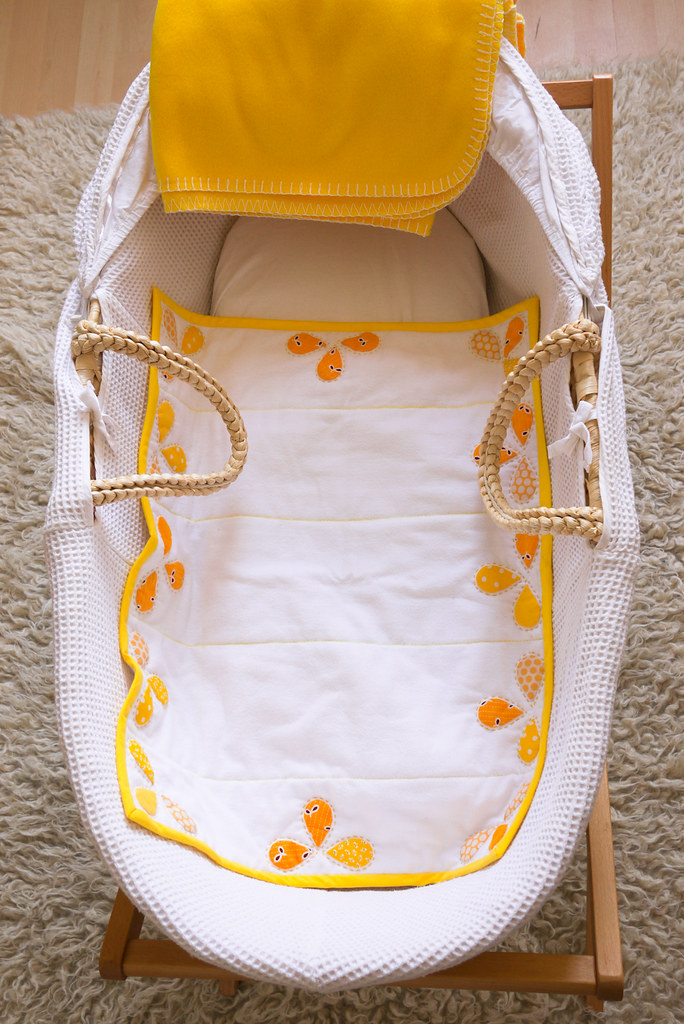
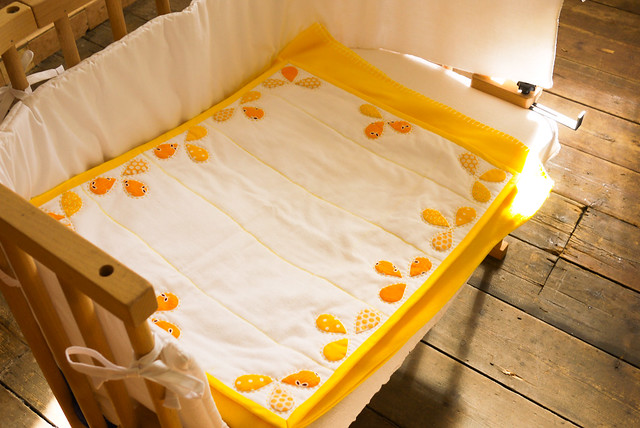
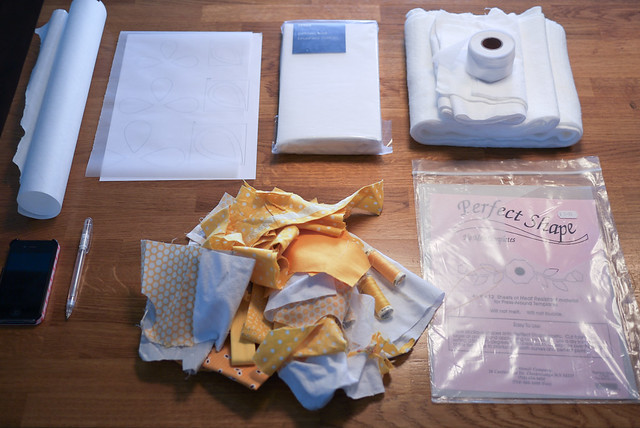
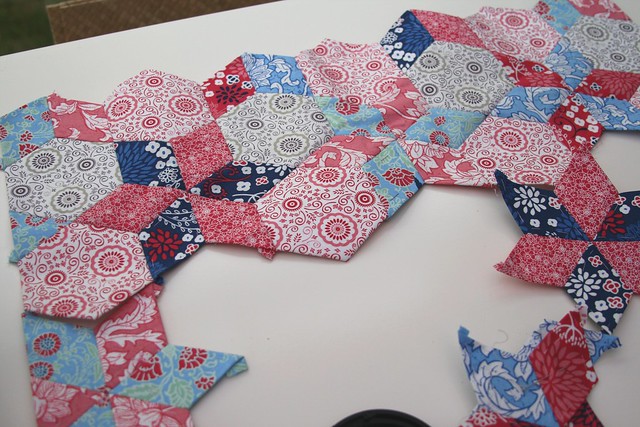
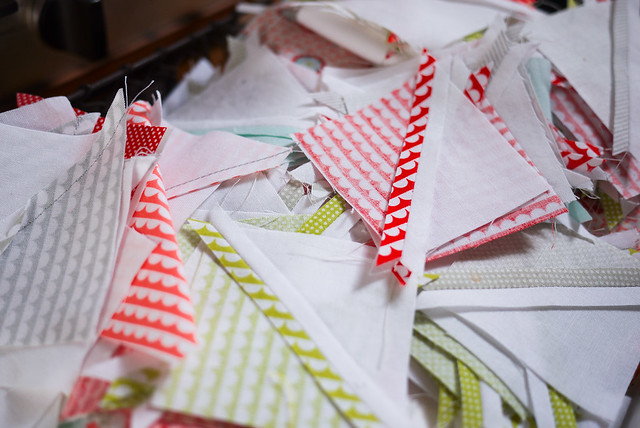
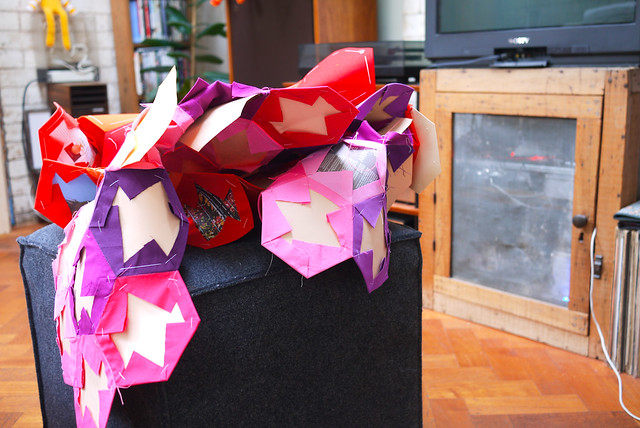
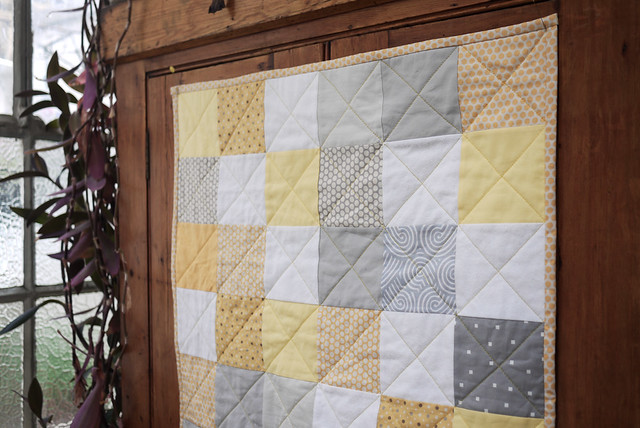
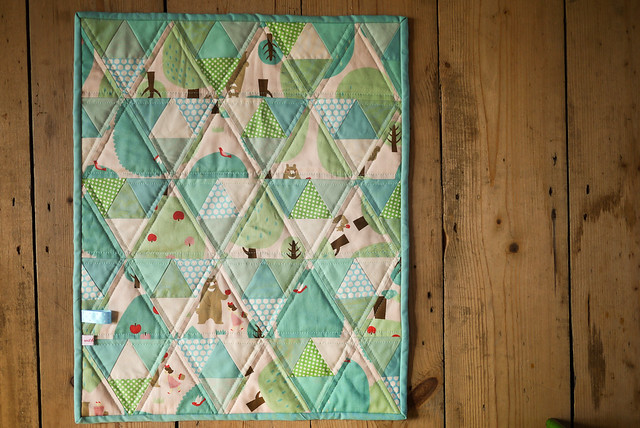
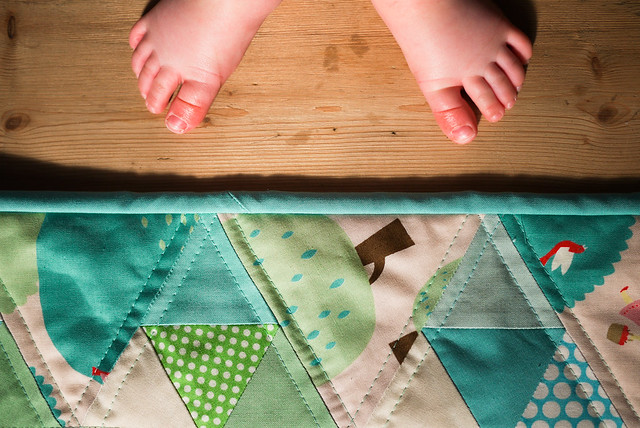
After making the iPad holder, I decided to try my hand at making a small baby quilt with the scraps. It's a really tiny quilt, best for a moses basket or cot I expect. I just don't have the gumption to make anything bigger, plus I really hate making 60° quilts. I love how they look, but I find them so hard to line up as the material is always so stretchy. I am sure my technique is terrible.


20130419-P1250923.jpg

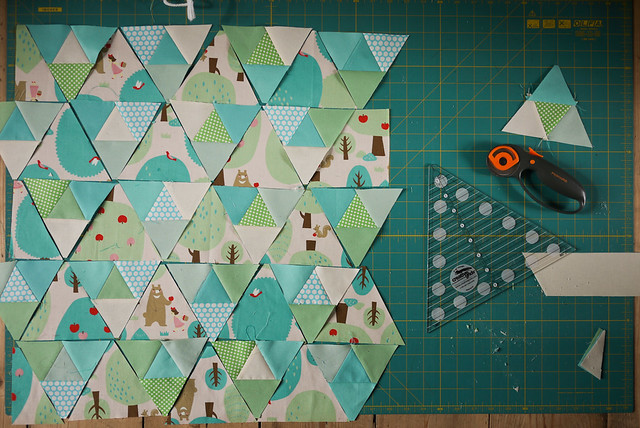
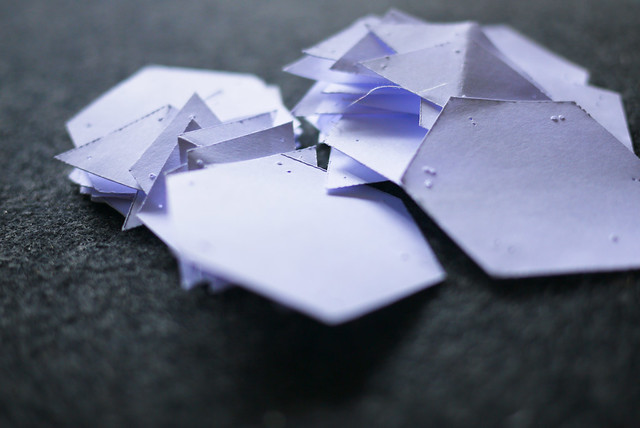
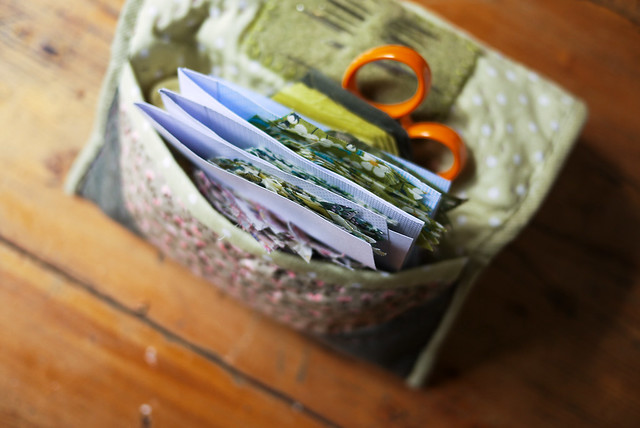
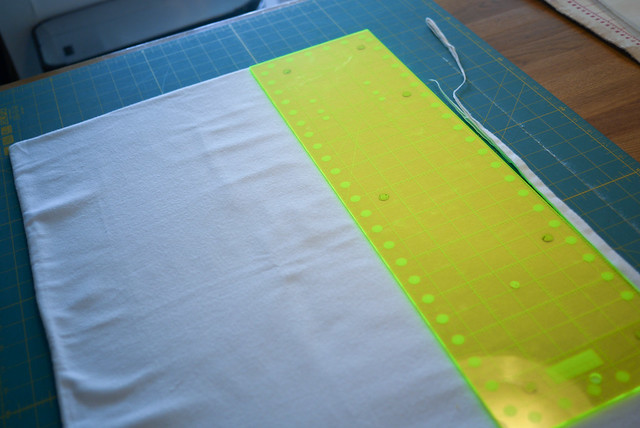
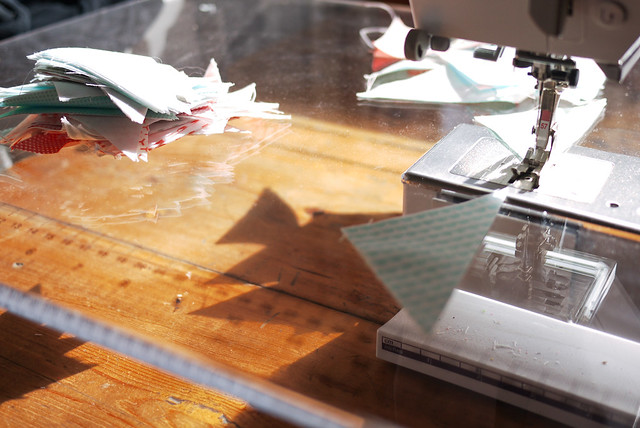
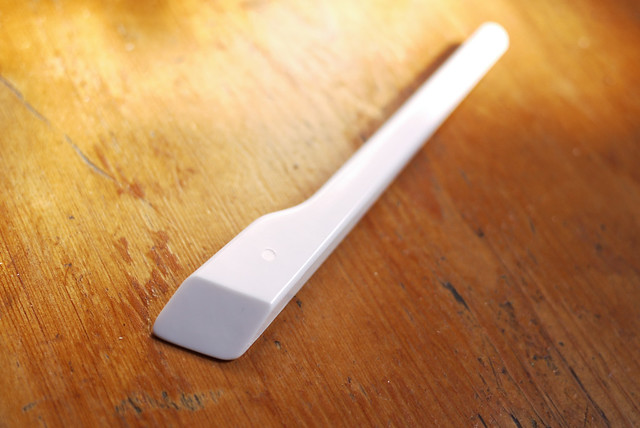
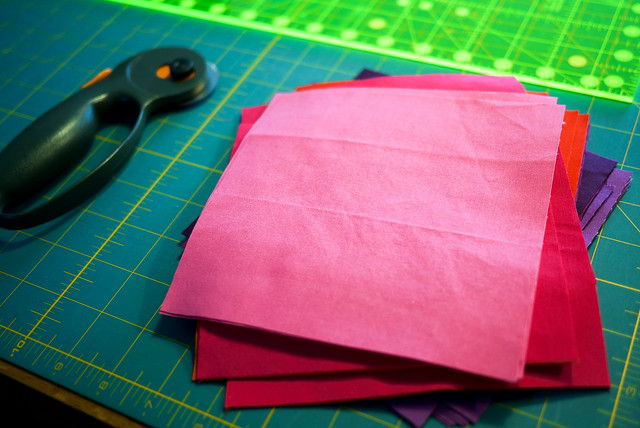
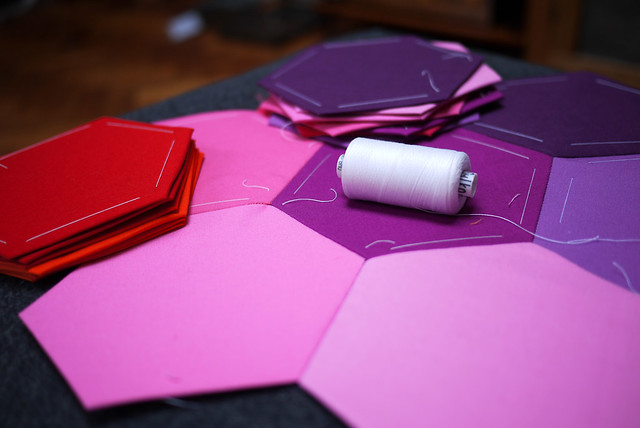
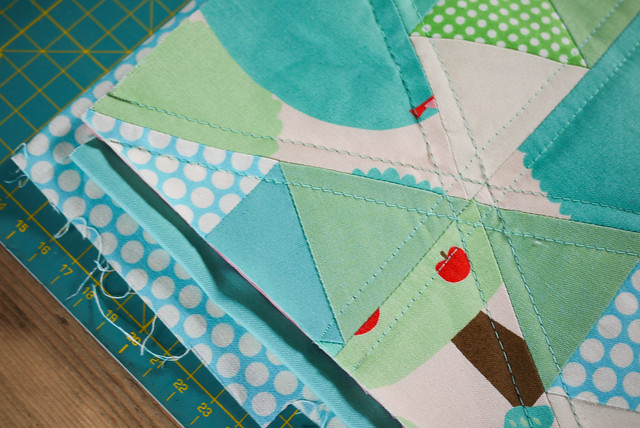
It took me weeks and weeks and weeks to do each of the smaller triangle units. I was grabbing a minute here, a minute there. You really can't leave a baby to amuse themselves can you? In desperation I started using the sewing machine during nap time which is never ideal as it's enough to wake up the delicate sleeper. She needs to harden up to the sound of sewing sooner or later! I am glad I am getting the use out of the 60° ruler I bought. It's really great. You can see I cut long strips to begin with. I really starched the fabric first to minimise stretch.


20130524-P1260368.jpg

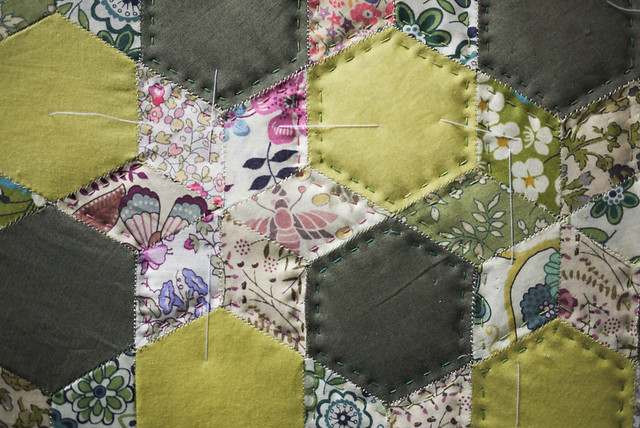
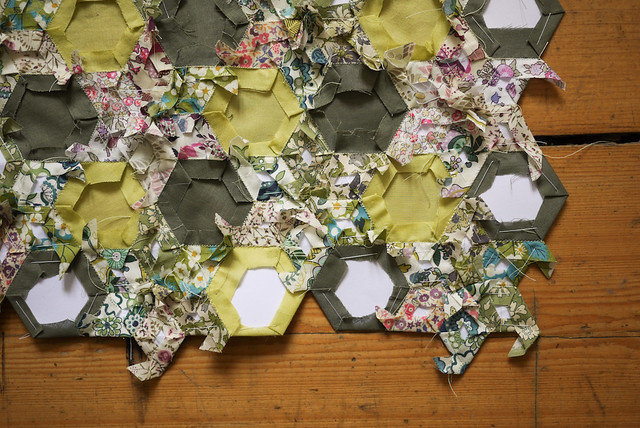
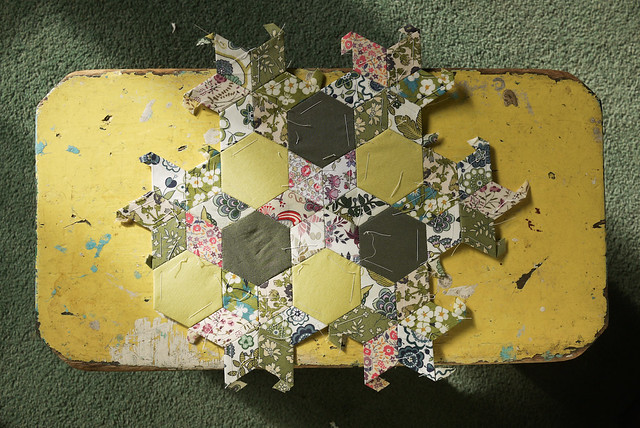
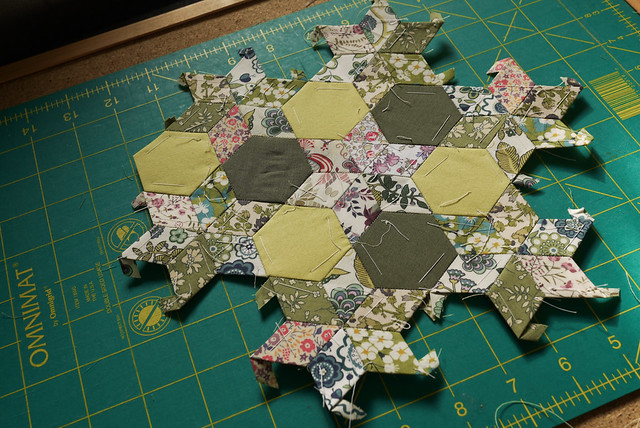
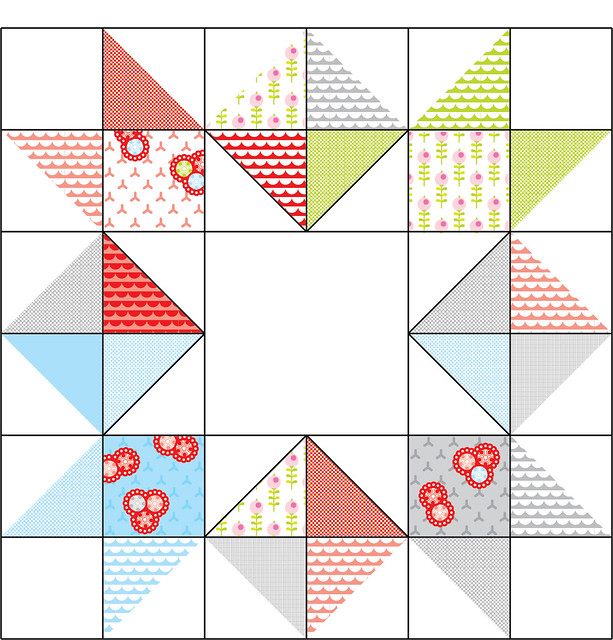
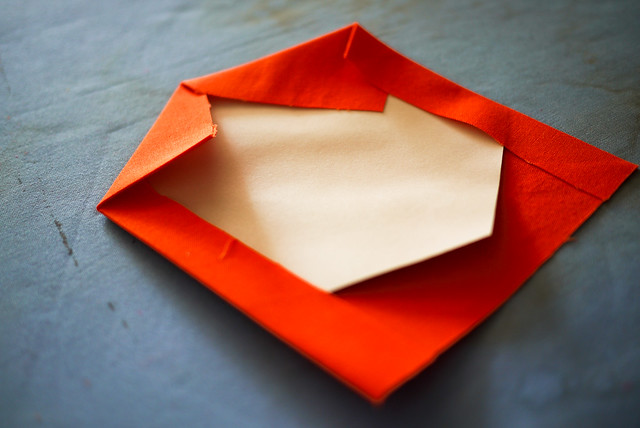
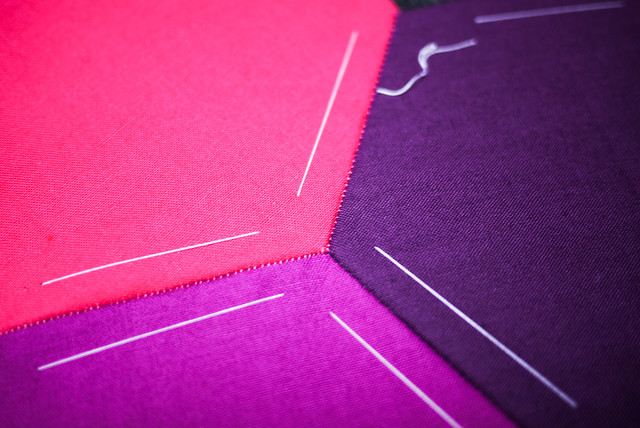
Stupidly though I should have done open seams. I just couldn't get them right so there are terrible lumps where all the points meet. It's a lot of fabric. Then when I came to sewing them, the minute I removed the pin the top layer would be dragged a little bit by the machine and nothing would quite line up. Jeeez. In the end, I just had to be cool about its wonkiness. I am sure most people have wonky quilts up close.


20130524-P1260372.jpg

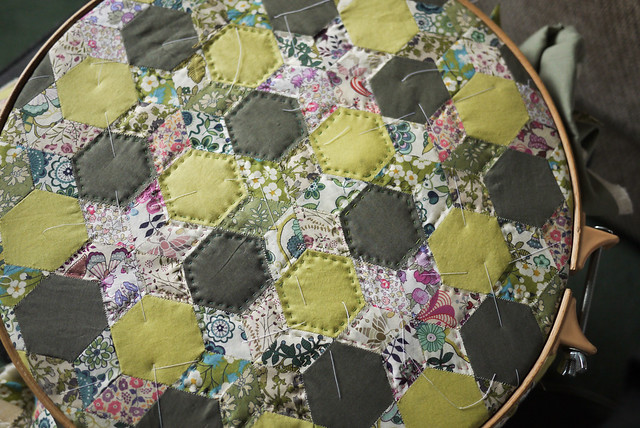
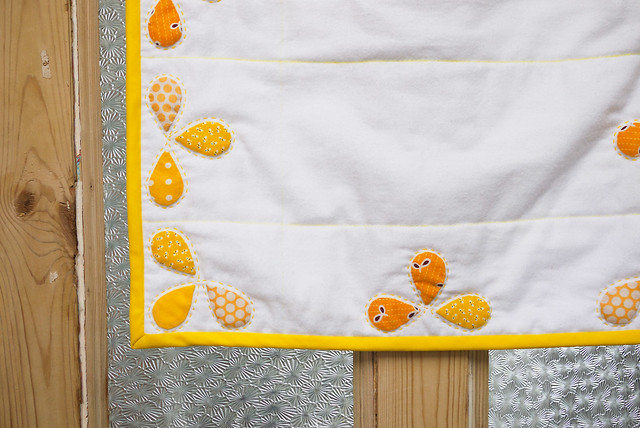
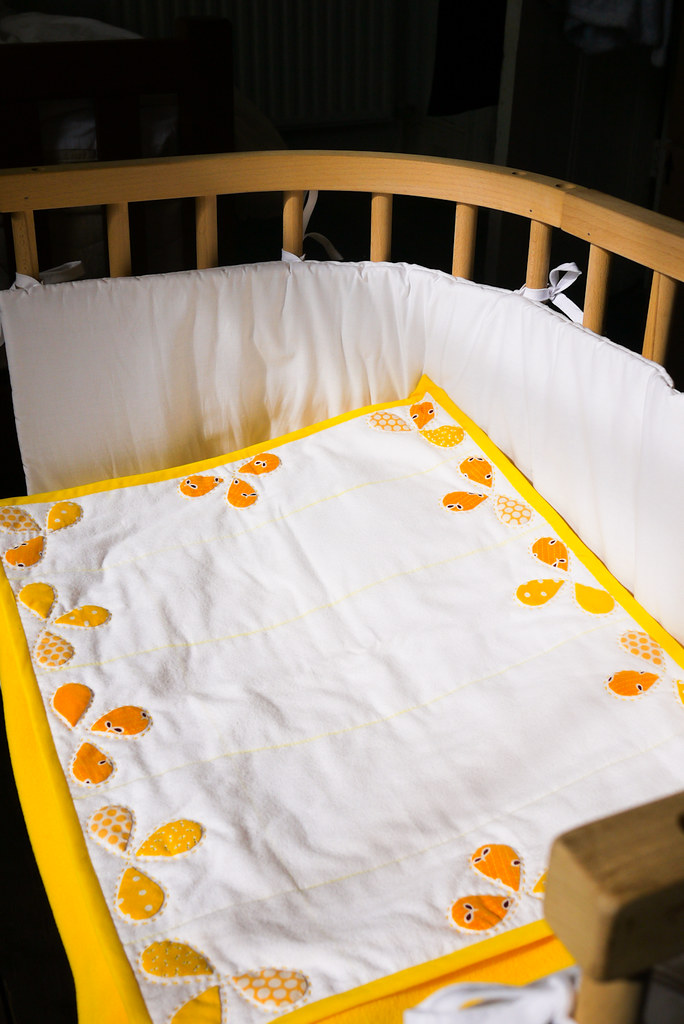
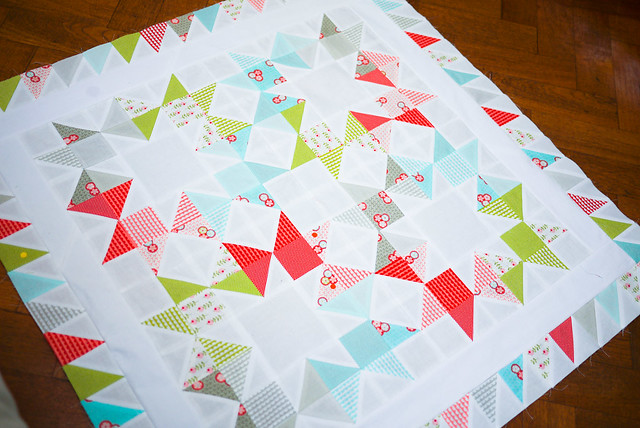
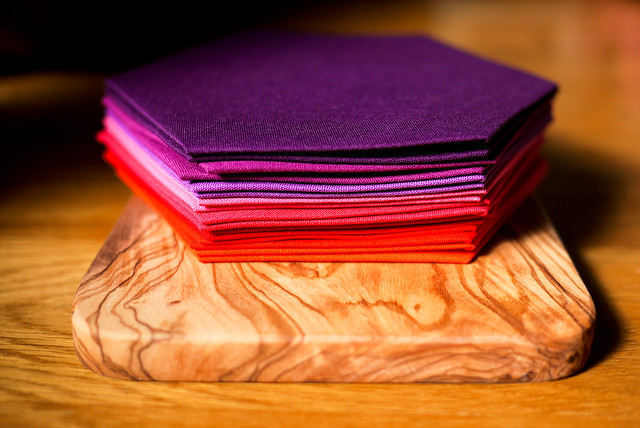
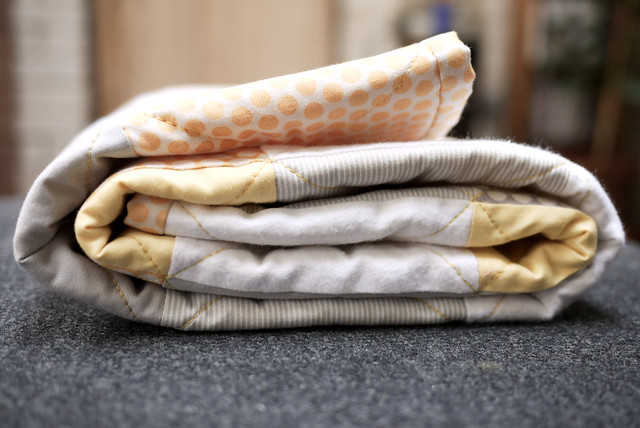
I couldn't decide what binding to do. Spots or solid. In the end I chose solids because I felt the quilt was already quite busy. I think the big print fabric needs to be shown in bigger swathes really. It was also the first time I have quilted 1/4" either side of the ditch rather than in it. I like the star pattern in creates in the middle.


20130527-P1260529.jpg

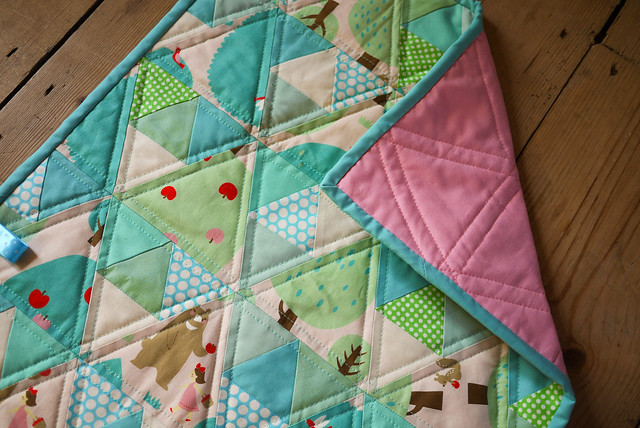
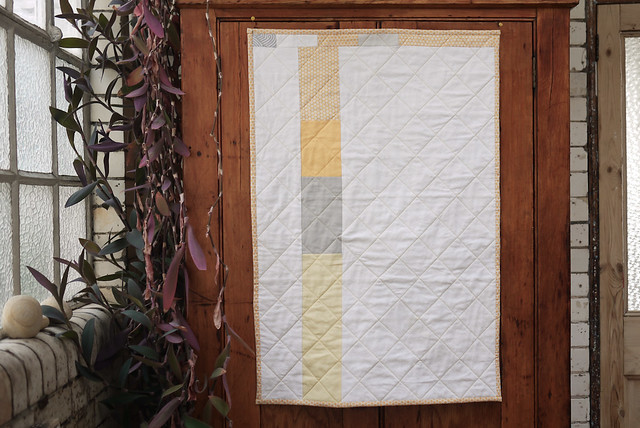
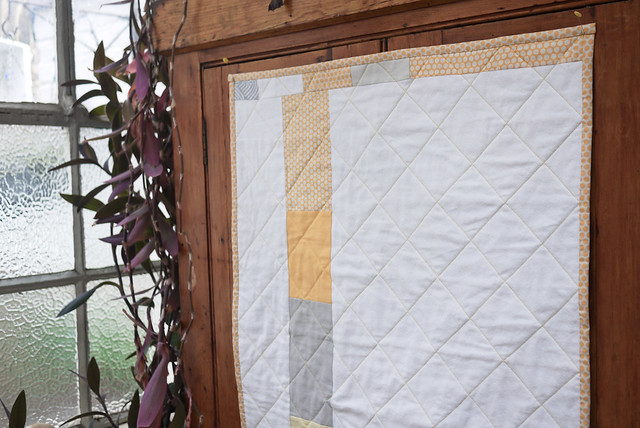
I'm not 100% about my pink backing, but I thought it would pick out the pink of the girls dress. I think I need to get used to it. Let's just hope it's a girl! Stupidly I totally forgot to tape down the backing before I basted it so the whole back has a crease in it. It's so small and yet I get a huge crease. How could I have been so dense? Sometimes I amaze myself. Going backwards is for losers though so I left it. My mum would be horrified. She is a great unpicker of things. I have seen her unpick massive double bed quilt tops just because she thinks the balance is wrong.


20130525-P1260383.jpg

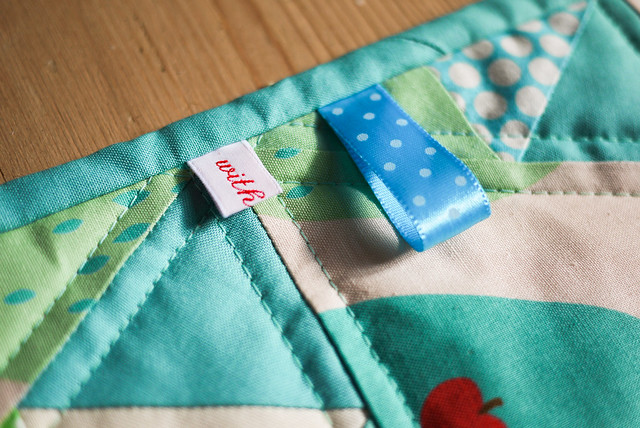
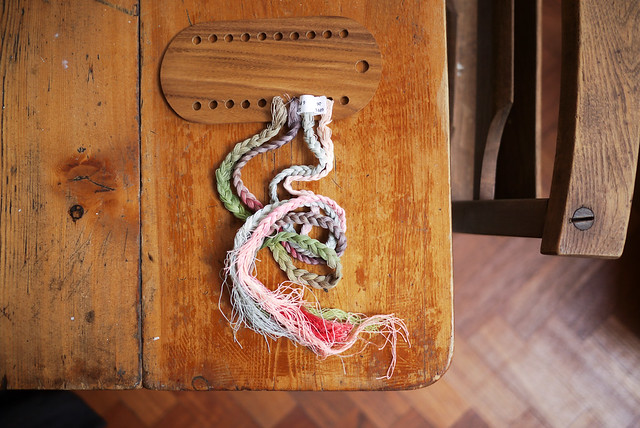
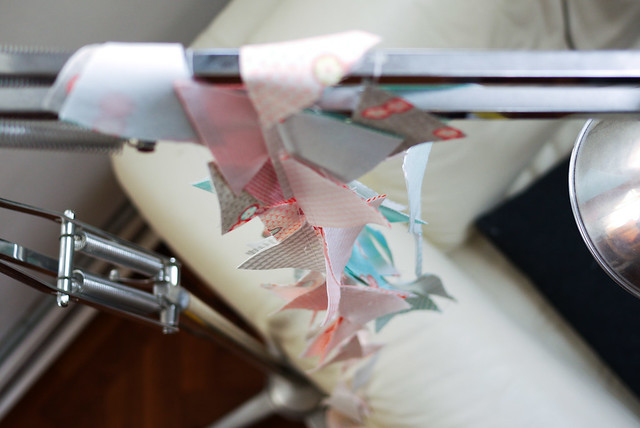
And of course, no quilt is complete with a few tags.


20130525-P1260389.jpg

So you might think I have just slagged this quilt off, but it is only because I wanted it to be perfect, specially seeing as I have lost my mind since having a baby. All in all I wanted it to be tasteful, not too garish and contemporary. I hope I succeeded in these things. Next I might make a log cabin version just to use up the very last bits. Waste not want not.

Friday, October 26, 2012

Hexagon update

20121023-P1230045.jpg So being one handed all the times means that not a great deal gets done, but recently I have been set free slightly by the play mat my sister gave me. Sometimes she'll happily gaze up at the dangling things for 20 mins! So I have fitted in a little bit of quilting. The top is finished, I basted it really messily and quickly and now I am quilting the stars in pink and green Stef Francis thread and greeny grey for the hexagons. I've noticed some of the hand seams are pretty weak so I hope the quilting holds it together a bit. I love how homemade it looks.

20121023-P1230048.jpg

Saturday, September 01, 2012

Hexagon Progress

Hexagons So I was hoping to be able to finish this project before the new addition to the family arrived but as my mum tells me, slow projects are suposed to be slow. This represents a month of sitting on the sofa so far. It's amazing how small it looks for all the time invested in it. I'm not quite sure how big I am going to make it. I am worried I will put it down and never finish it. At the moment I am set on adding 6 more horizontal rows. Then I will stand back and assess how I feel about it. I definitely enjoy the process so if I get the time then I might well continue with it.

Hexagons Here's the back. It's a bit messy because my seams are 1/2 inch not 1/4 but it works for me. It still seems to lie pretty flat. I also put lots if knots in it when I reach a corner to make it tight and to help if any of it should unravel.

Hexagons I reuse the templates a lot as it seems to save time. You can see I only take the ones out which aren't open at the edges.

Hexagons They're a bit bent but it doesn't seem to make any difference to the end result. So I have got a big stack of them ready to reuse and I have cut lots of fabric ready to be tacked down.

Packing up Here is my bulging travel sewing kit. I could really do with a tin, but this will do. I have created a mini filing system out of bits of cut down old envelopes so I can keep the colours in some order. I have bought a new reel of thread and loaded up with sharp needles. I am going to pack this in my hospital bag and try and get some tacking done during my sejourn in the maternity ward from Monday. We'll see if I actually feel like doing any. I just thought that then this whole quilt will hold the memory of this very memorable time. I do like it when objects hold memories.

Thursday, August 23, 2012

Hexagoals

20120823-P1220168.jpg

Hexapattern.jpg So you can see how far I have got. If I were to make this a newborn quilt then I'd be nearly there. I drew up a diagram to help show me where the pink stars should be. But. I could make it bigger. I am not sure if I can hack that much more work though!

Hexapattern_cot.jpg This would be a cot sized quilt. Well a bit less tall but it would fit well I think. The orange square reminds me how far I am now and shows just how much more there would be to do. I wouldn't even be half way! Yikes.

Friday, August 17, 2012

Moses Basket Quilt

20120701-P1210560.jpg So one pillowcase has become the softest baby quilt

20120701-P1210555.jpg The applique petals came out perfectly. There are still a few yellow chalk marks where I quilted some straight lines but they'll come out with use.

20120701-P1210557.jpg Here is a close up of the quilting stitches I did round the petals. I try to use cotton abrode but I don't have very much. So when in doubt I simply use Gutterman button thread which they seem to sell everywhere and is really cheap. I find it really smooth and just the right thickness. Terrible I know, but it makes for a really cheap quilt! The binding was just a pack of yellow bias binding from John Lewis.

20120701-P1210538.jpg Basically a very quick, cheap, soft quilt! I was thinking I might try and draw up the pattern. I can't quite decide.

Pillowcase baby quilt It fits perfectly in the moses basket.

Pillowcase baby quilt And in the Babybay bedside cot.

Pillowcase baby quilt I know you're not suposed to use blankets but they seem to sell them in Mamas&Papas so I guess they're just there to look nice really. See the start of the project here

Pillowcase Baby Quilt

20120609-P1210006.jpg So I decided to make a little moses basket quilt. I thought it would be a perfect scrap bag project as the quilt only needs to be 18"x22.5". I saw this Honey Bee block on Flickr and it gave me the idea to make a simple plain white, soft quilt with a few of the yellow petals appliqued in the corners. Rachel had made some lovely mini bunting with yellow bias binding and I was really struck by how nice the yellow was. I thought it would look great with some soft, squidgy brushed cotton.

20120609-P1200993.jpg Then I found a brushed cotton pillowcase in Tescos for £3.50. Suddenly the idea was born! So I dug everything else out of the cupboard just before we moved. I found some strips of old wadding and some yellow bits from the scrap bag to do some small applique with. I'm always chuffed when a project uses offcuts and scraps.

20120609-P1210007.jpg I cut the seams off the edges to give me front and back fabric panels. Then I used my wadding tape to tape lots of strips together to make one big panel of wadding.

20120609-P1200999.jpg Then I cut some petal shapes out of freezer paper and ironed then onto my scraps which I then cut out. I think I've been a bit mean with the seem but hey ho. So now I get to sit and tack them all before I apply them. Time to watch some mindless telly.

Thursday, August 16, 2012

Hexagon progress

Liberty mini Well more progress was made today during sofa time. My mum knitted 13 matinee jackets when she was waiting to give birth. She's an amazing knitter, she doesn't even need to look at what she is doing. I knit like a snail and I can't fix a mistake. But sewing mini hexs is easy peasy!

Liberty mini I've scaled mine down to 1" Hexs. It just came out that way. It's coming together great. Some of the joins are a little hairy but I just tell myself how handmade it will look. I am not sure how big it will be. I might just keep on going until the Big Day!

Hexadoodle I was really inspired to do this by seeing Ruth's work. Just the intricacy and the detail in the fabrics. I love the small prints. Ruth was kind enough to send me the pattern as I can't really do geometry, thanks Ruth! I have some templates somewhere and lots of books with it all in but, yes, they are all buried deep in boxes. The bane of moving house. I'll never find them again amongst the sea of boxes.

Monday, May 28, 2012

Swoon Leftovers

20120528-P1200789.jpg Finally I have finished the top of this small leftover quilt.

20120528-P1200790.jpg I didn't do the borders particularly well but everything lines up and is pretty accurate which is good. Now I just need to baste and quilt it. It can join the queue.

20120528-P1200793.jpg I'm on the fifth block of the big Swoon quilt so I am officially half way!

20120528-P1200794.jpg I'm enjoying the Stef Francis fine cotton which is good. I have had to start waxing it a bit though as it keeps knotting. Mum did show me how to plat and keep my thread though which makes life a lot easier.

Saturday, May 12, 2012

Swoon Leftovers

20120512-P1200696.jpg It was such a sunny, lazy morning today. I had no emails, no pressing things to do. In fact I was feeling a bit sorry for myself because no one was emailing me. So I decided to have a think about all the mini triangles of waste material from the Swoon quilt. So I set up shop and got the chain piecing machine cranked into action. 20120512-P1200692.jpg I'd sewn half of them when I realised just how many I was wasting. So I just had to go back and finish off the ones I hadn't started on. I hate going backwards in general, but today felt like a good day of nothing in which to get to grips with the task. It was much quicker than I thought. 20120512-P1200699.jpg Then it was just a case of cutting and ironing each one flat. Having to do flat open seams is annoying with an iron so I have started using my seam flattening tool. It really is a great tool. 20120512-P1200700.jpg Here it is. I thoroughly recommend one to everyone. It speeds up the job no end and makes ironing much easier. In fact, you don't really need to iron them afterwards as they go pretty flat, but I want it to be as perfect as possible.
I couldn't decide what to do with them so I had a hunt on Flickr and Pinterest and saw from Little Scraps of Happiness which lends itself perfectly to the offcuts I have. Swoon leftover.jpg So I drew up a diagram. I couldn't decide whether to group the colours or not so I had a tinker and I think grouping each corner slightly will work. 20120512-P1200703.jpg So now I have my station set up and I am trimming in front of the TV.

Thursday, September 29, 2011

The Hexagon Quilt

20110923-P1160446.jpg

Progress is slow, but this is what has been keeping me quiet. I am going to do something very sombre after this as it's doing my head in a bit. I might have to put it away for a while when I've finished the top.

Sunday, September 04, 2011

Hexagons

20110903-P1160101.jpg

So what's up this weekend? Not a lot really. I decided to embark on learning how to do these hexagons. I have been quite good really. The materials are all plains which means they are a lot cheaper than some of those nice patterned materials; a good thing when you are testing out a method. I decided to make my squares pretty big for this first attempt, plus it also means I don't have to make as many.

20110903-P1160093.jpg

After reading up about it on the web I decided to follow the instructions from the card templates I bought from Birmingham. I bought HEX275 2-3/4" Hexagons from Paper Pieces. Apparently they measure one edge to create their sizes. In total my hexagons are 5 1/2" wide which is pretty big. So I set about cutting 6 1/8" squares, which they recommend over cutting hexagons (that perspex hexagon guide was a waste of money then). I have no idea if this is a good measurement, I just knew that I wanted a 1/2" overlap as 1/4" is harder to iron flat.

Hex.gif

After I had started cutting, it occurred to me that I should be working out how many squares I need to cut, but I am terrible at maths. I made this picture to try and help me but I think the end result is a bit enormous so I might just make half of it. The white outlines are just to help me see where the flowers are so I know how many to make. This is what I plan to do first. So with this plan in mind I settled on cutting 6 blocks of each colour. I have split the colours into three bands: purples, oranges and yellows and tried to collect 6-7 colours in each band.

I'm not really sure if I like it. It's hardly subtle, but hey ho, this seems to just be how I roll. All that tasteful William Morris was bound to have a backlash. I have been informed that it has the potential to look 'hideous', but I must soldier on, even if it is just so I can learn the technique. I have a bag of treasured flowery scraps just waiting to be made into a smaller, more perfect version of whatever this turns out to be.

20110903-P1160099.jpg

As for my technique. I decided to just iron the corners over onto the paper templates. I was a bit worried as the heat of the iron warps the card so I paused and started making one flower to see if it affected the outcome. It didn't seem to make any difference.

20110904-P1160124.jpg

I made my first flower whilst watching the X factor and it doesn't look too bad. There are a few mismatched lengths, but I faithfully followed the card so I am unsure why they vary. Maybe they are small enough not to matter, I guess i'll see if that becomes a problem later on.

20110904-P1160122.jpg

I used the basic whip stitch technique which some people say is not the best as you can see the stitches but I think I will reserve judgement. It looks okay to me and it does show that it's handmade.

Anyway I have run out of card templates now so I will have to start making my own. What a pain...

Sunday, August 21, 2011

Finished!

Yellow Quilt

I stayed up quite late but I finished it off. Now for the next project! Maybe I'll be a bit better with my measurements next time. I miscalculated the backing dimensions on this quite quite drastically hence the little patterned strip at the top, but I quite like it! I have also decided that Kei Honeycomb Dots are my favourite kind of dots ever. You can get them from Fabricworm or M is for Make.

20110821-P1150742.jpg

20110821-P1150753.jpg

20110821-P1150743.jpg

20110821-P1150757.jpg