

Finally after a few wrong starts I've come up with my version of the square. I couldn't work out the pattern on the blog as I am not that great at following instructions. So that I can remember it and just in case you want to follow it, here's the pattern I am using. I've never written down a pattern before. I am probably not being very clear so I have inserted lots of pictures.
CH = Chain stitch
SS = Slip stitch
TR = Treble crochet (UK) in the US it should be a Double crochet.
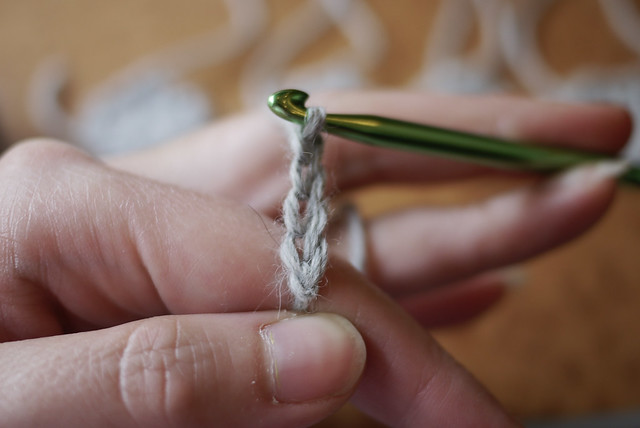
Foundation ring: Yarn A, work 4ch and join with a SS to form the ring. (I always make my stitches very loose as it makes everything easier).

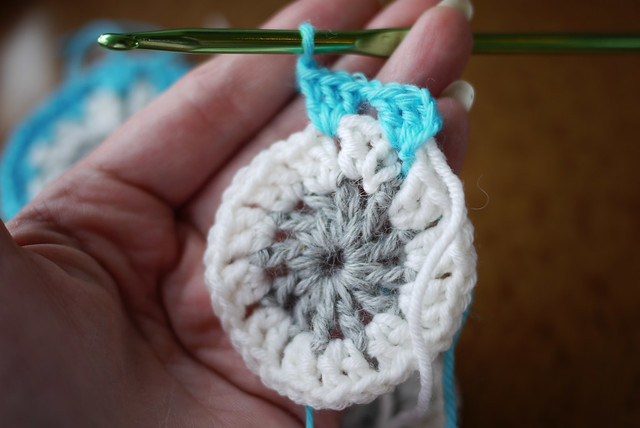
Round 1: 3CH (counts as 1TR) then 1TR into ring, then 1CH, repeat 1TR + 1CH 10 times (12TR total), join with SS into 3rd stitch of 3CH. Break off yarn. This should give you a circle with gaps between each treble.
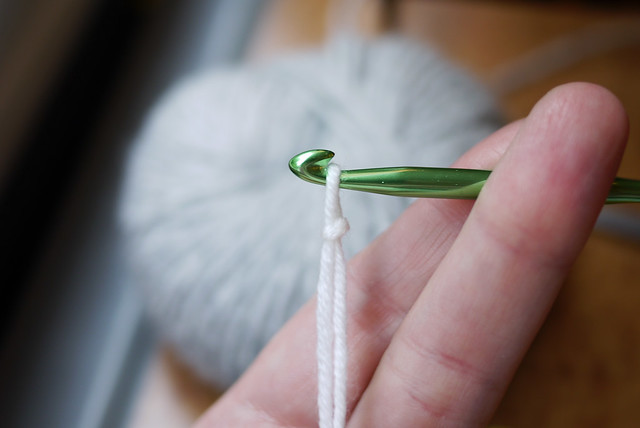
Round 2: Join yarn B inbetween the first and last treble of previous round. (I always start with quite a loose slip knot so I can pull it tighter later when I tie the ends off and pull the knot to the back).
3CH inbetween two trebles in the gap the CH from the previous round has created (counts as 1TR)
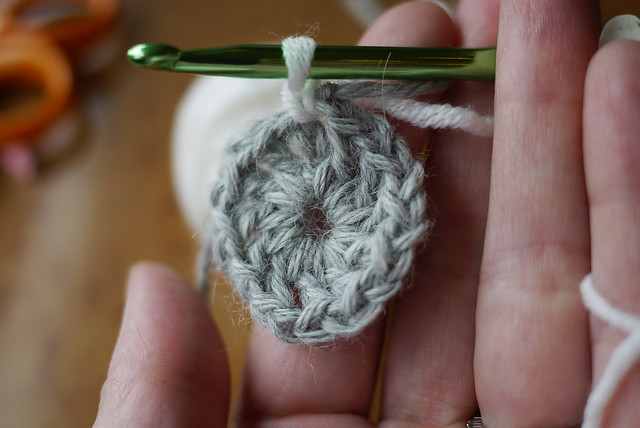
Then 1TR into the same gap, then 1CH. Repeat doing 2TR + 1CH into every gap between the TR in the previous round created by the CH to create 12 groups of 2TR. Break off yarn.
 "
"You should see when you stretch it that you have gaps inbetween the TR groups.

Round 3: Join yarn C in the gap between TRs created by the CH of the previous round. I usually join between the last and the first TR.
3CH (counts as 1TR) then 2TR and 1CH, then 3TR + 1CH in the next CH gap pf the previous round. Repeat 10 times. (12TR total). Break off yarn.
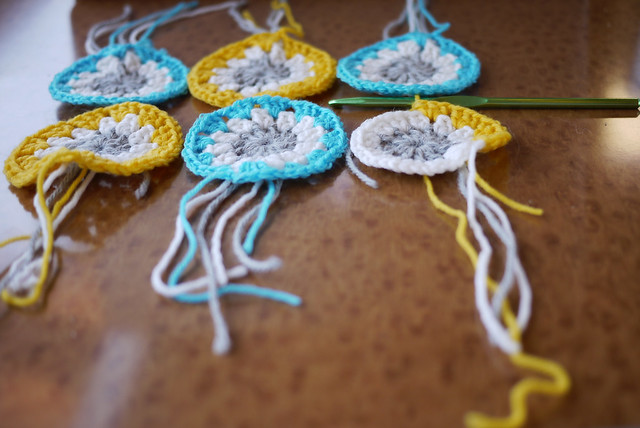
Round 4: Join yarn C in the gap between TRs. I usually join between the last and the first TR space. 3CH (counts as 1TR), 2TR, 3CH, 3TR to make your corner, then 3TR + 1CH into the next CH space of the previous round, repeat 3TR + 1CH into the next CH space of the previous round, then in the next CH space make a corner with 3TR, 3CH, 3TR. Repeat to end until you have completed all four corners and tie off.
That's it! Does that make sense? Now I just have to learn this joining at you go thing.


4 comments:
Thanks for this. I've been making them too but they haven't been sitting flat. I haven't been putting a ch between each group of dc's but I'm going to try your technique now!
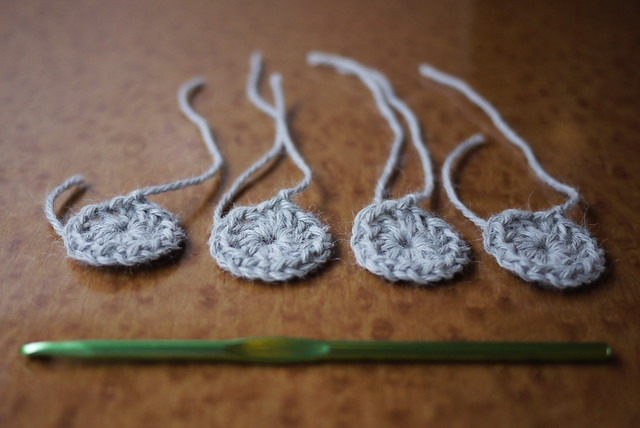
I made quite a few samples. Some had no spaces in them and either curled in on themselves or went all wavey. This method works for me, but Rachel has a different method.
great tutorial - thanks for that. Just discovered your blog, it's great, you are so lucky to live in London and be surrounded by so much creativity and cool shops - sadly lacking in my neck of the woods!
Hi Elaine, it's true there are loads of shops and shows and things to do, but I compromise on space. More than anything I would love to have a sewing room filled with shelves of the enormous amount of things I seem to accrue but my compact London flat only has room for a box under the sofa!
Anyway, i hope the tutorial makes sense! I'll post one about joining them all together as soon as I get on it.
Post a Comment