
Amazingly, my friend Sam leant me her Stokke Tripp Trapp highchair, but there has been a bit of sliding about in it and a few tears so I looked up buying the baby padded cushion bit only to realise that I have the old style Tripp Trapp chair. I couldn't bear scouring the web for ages in the hope of finding one so I just made one instead. I did it pretty shoddily I must admit but it works perfectly and it is all made from scraps I had lying around.
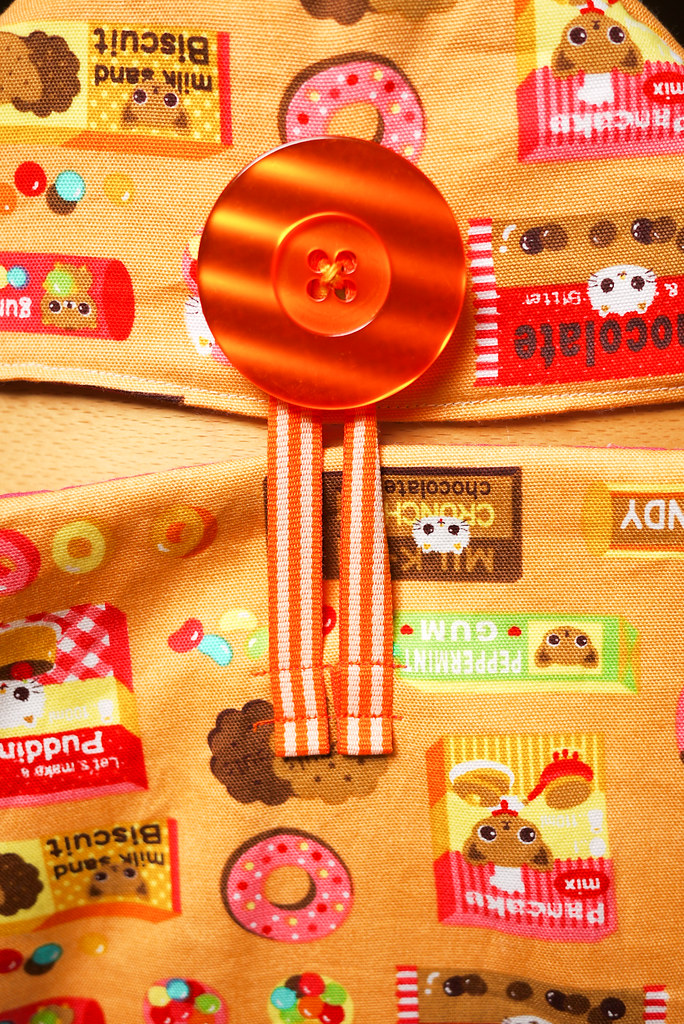
I had bought some Lecien decco weight Happy Chihuahuas with Sweet Treats fabric ages a go from
Fabricworm. It was a real impulse buy and when it came I just thought 'when am I ever going to use that!' and put it away as an ill-considered buy. So I was really pleased to dig it out and find it perfect for this project.
It's pretty simple really. I just used some left over wadding and a bit of cheap stuffing to pad out the middle then made it fold round the back. I spent some time searching for some velcro but in the end I used this big orange button and ribbon, both of which are other things I never thought I would end up using ever!
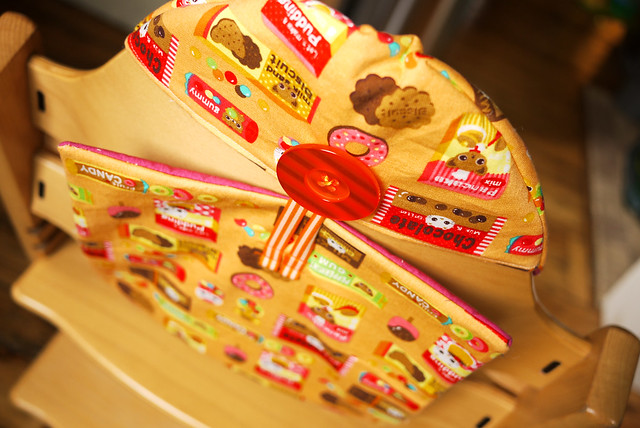
It all worked out perfectly! I think if I had had elasticated stuff to make the button loop then it might have been better but the wadding gives it some extra give which makes it ties up pretty snuggly.
If you're interested in making one then it's pretty simple. It took about an hour to make. You need to cut front, back and wadding to size B. Then cut front in A dims. The dashed line is a fold. This makes the flap to go over the top.
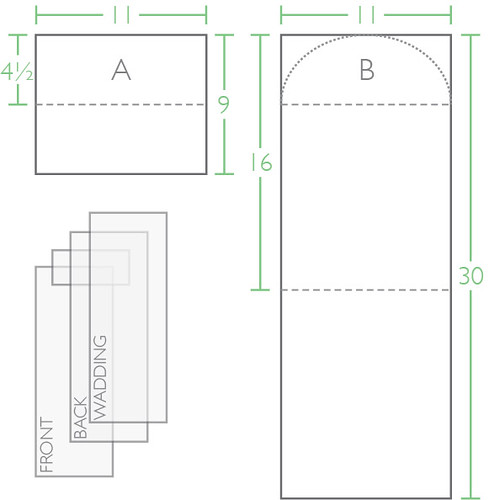
You just lay all the layers together in the right order and then sew 1/4" all the way round leaving a gap at the bottom so you can turn it inside out. The dotted line at the top of B is where you sew to create the round top bit. Once inside out I just padded out the front bit with some extra stuffing. I did it down to about 16". I kept trying it on the chair to see where I wanted it to end. I made it quite loose as she doesn't need that much. Then I sewed the seam up and added the loop and button.
Next I plan to make a cushion for the seat. Small steps though.


2 comments:
That material is perfect!
That material is perfect! It looks great
Post a Comment