
I made a pact with myself. I would start no other project whilst I was doing a baby quilt. I would not get side tracked. I feel like I have been let out of prison! I thought I would share The Slow Task of Stacy's Baby Quilt with you, you lucky people.
 Weekend 1 / Step 1: Find a pattern
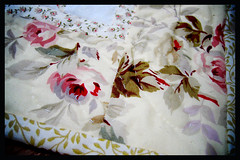
 I took my mum to a quilt show that was like the opening five minutes of a jumble sale all day long. I felt very weak and insipid next to ladies with such drive and frantic passions, but I managed to squeeze into the Sunflower Fabrics stand and see this mini quilt made my Maggie Wise which she kindly let me photograph as I loved the material so much. I know it's flowery. I don't know what comes over me. I just get all girly and flouncy about these things. The pattern this is based on is called 'Little Stars' and you can get it from here
 Step 2: Then I set about buying the material
Again all from Maggie's stall, but you can also get it from her website.
Step 3: I went home and washed it all, dryed it all, ironed it all and starched it all. Then put it away and didn't think about it for a few weeks.
 Weekend 2 / Step 4: Measure and Cut
 I got the huge cutting matt out and cut all the bits out with a rotary cutter. I was knackered after that and put the whole thing away for a long time. You see how long these things take me. I am very weak.
 Weekend 3 / Step 5: The Sowing Machine
My favourite bit has to be the actual pinning and sowing of the top part. I can't say I did it very well. Making star points line up is hard. Mine are qute wonky but I got better as I went along.
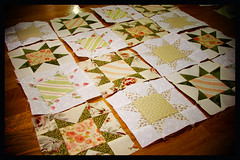 Step 6: Working it Out
 Because my pattern was adaptd there were some tense math moments where decisions were made, retracted, reinstated then abandoned. After finally deciding how it should be arranged. I pinned, sowed it all together and left it in the cupboard for weeks.
Weekend 4 / Step 7: Making the Sandwich
I taped the backing down tight on a flat surface. I taped the batting/wadding on top nice and tight, then I taped the top over it all and tacked the thing together. I hate that bit, it's boring. Back in the cupbaord it went.
 Weekend 5 / Step 8: Quilting
 Then I sowed down all the ditches to stabalise the quilt then I movd on to my second favourite part, the laborious hand quilting bit. I drew a design on the computer, based on one I had seen but which was too big. I made a stencil, then pen pricked it down the borders. Then I squished it in a frame, stuck a needle in it then proceeded to half watch every episode of CSI going whilst hand quilting my borders. This took a long time. I am now a CSI expert. Apart from all the bits where I look up and realised I missed the most integral part of the plot.
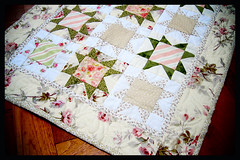
Weekend 6 / Step 9: The borders
I managed to tack all the borders over breakfast with my mum and sow all the borders on a very quiet sunday train journey from Cambridge to London whilst it pelted with rain outside. It was very theraputic, although I felt a bit of an old granma sowing a quilt in public. Luckily I had the train almost to myself.
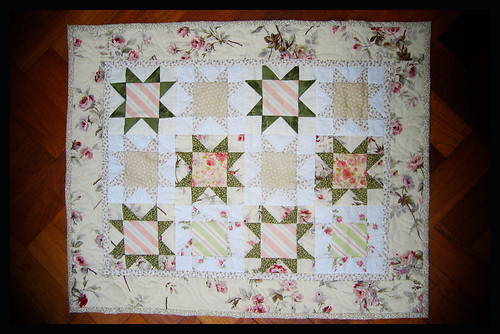
 Step 9: Untack it and tie it
 I picked out all the tacking last night and cut off all the loose ends, one of which was quite integral which I shall now have to go and fix, but in essence it is done. I started when she was 3 months pregnant, I finish when she has 4 weeks to go. You see how slow I am. One baby quilt: done.


3 comments:
Jay, it's beautiful. What's on the back? I've just finished Ben's quilt but can't decide on the backing. Annie xx
Annie, the little green leaf print which is on the edges is what's on the back. I got it in a bargain bucket somewhere. I always think a tightly patterned backing hides and dodgy stitich you do afterwards. Will you show me your quilt when you finish it? I'd love to see it!
psst, I've got a blog. Check it out.
Post a Comment